Difference between revisions of "Grim Ward"
Jump to navigation
Jump to search
Naturelover (talk | contribs) |
Onderduiker (talk | contribs) m (Removed |SS=None) |
||
| (4 intermediate revisions by 2 users not shown) | |||
| Line 3: | Line 3: | ||
|File=Warcries | |File=Warcries | ||
|RS=Find Item | |RS=Find Item | ||
| − | |SS= | + | |SS=Find Potion (DIIR only) |
|Type=Corpse cast and area effect debuff | |Type=Corpse cast and area effect debuff | ||
|Tier=5 | |Tier=5 | ||
| Line 12: | Line 12: | ||
|ANM=No | |ANM=No | ||
|WD=No | |WD=No | ||
| − | |LB=No | + | |LB=No}} |
| − | |||
{{U|=This skill allows the Barbarian to fashion a totem out of the carcass of his slain enemies. The resulting talisman serves as a grave warning to all of the minions of the Prime Evils. The mere sight of the Totem causes monsters to flee in terror. With additional training the warrior can increase the potency of the ward.}} | {{U|=This skill allows the Barbarian to fashion a totem out of the carcass of his slain enemies. The resulting talisman serves as a grave warning to all of the minions of the Prime Evils. The mere sight of the Totem causes monsters to flee in terror. With additional training the warrior can increase the potency of the ward.}} | ||
| Line 21: | Line 20: | ||
|- | |- | ||
!align=left|[[Radius]] (Yards) | !align=left|[[Radius]] (Yards) | ||
| − | |(2+slvl) * 2/3 (LoD)<br/> | + | |(2+slvl) * 2/3 (LoD)<br/>(5+slvl) * 2/3 (D2R) |
| − | (5+slvl) * 2/3 (D2R) | ||
|- | |- | ||
!align=left|Flee Distance (Yards) | !align=left|Flee Distance (Yards) | ||
| Line 29: | Line 27: | ||
!align=left|Flee Duration (Seconds) | !align=left|Flee Duration (Seconds) | ||
|2.4 | |2.4 | ||
| + | |- | ||
| + | !align=left|- [[Attack rate]] (D2R only) | ||
| + | | min( [75 * [ (110*slvl) / (slvl+6)] / 100] , 75) | ||
|- | |- | ||
!align=left|-% [[Movement speed]] (D2R only) | !align=left|-% [[Movement speed]] (D2R only) | ||
| − | | | + | | min( [75 * [ (110*slvl) / (slvl+6)] / 100] , 75) |
|- | |- | ||
!align=left|[[Damage Resist]] -% (D2R only) | !align=left|[[Damage Resist]] -% (D2R only) | ||
| Line 37: | Line 38: | ||
|- | |- | ||
!align=left|{{S|=Damage Resist -%}} (D2R only) | !align=left|{{S|=Damage Resist -%}} (D2R only) | ||
| − | |5 * | + | |5 * [[Find Potion]].blvl |
|- | |- | ||
!align=left|Ward Duration (Seconds) | !align=left|Ward Duration (Seconds) | ||
| Line 48: | Line 49: | ||
*[[Cast rate]] | *[[Cast rate]] | ||
| − | *In D2R the DR | + | *In D2R the -DR% is reduced to 20% (1/5) effectiveness against [[Immune to Physical]] monsters: this is applied to undead before [[Sanctuary (skill)|Sanctuary]]. -DR% works at 100% effectiveness against sundered monsters. |
| + | *In D2R the - Attack rate is usually redundant due to monsters prioritizing fleeing instead of attacking, although they can very rarely attack if stuck in confined spaces or if oscillating between fleeing and attacking on the edge of the flee radius. It can also be applicable at the moment of casting Grim Ward or if rapidly casting [[Taunt]] to force a monster to attack. | ||
*Must be adjacent to [[corpse]] to raise a ward from it (although it does not need to be selected). | *Must be adjacent to [[corpse]] to raise a ward from it (although it does not need to be selected). | ||
*In addition to the normal restrictions on corpse selection, the following cannot be used due to lack of flesh, or bones (they aren't flagged as soft in MonStats2.txt): | *In addition to the normal restrictions on corpse selection, the following cannot be used due to lack of flesh, or bones (they aren't flagged as soft in MonStats2.txt): | ||
| Line 90: | Line 92: | ||
| − | *Only causes normal and minion monsters to flee (with [[Altering AI|a few exceptions]]) for specified distance and duration. | + | *Only causes normal and minion monsters to flee (with [[Altering AI|a few exceptions]]) for specified distance and duration. In D2R this also means slowing and -DR% are only applied to monsters that flee. |
| Line 147: | Line 149: | ||
<br/> | <br/> | ||
| − | == | + | ==Level 1-60 (LoD)== |
| − | {{Levels 1- | + | {{Levels 1-20}} |
|- | |- | ||
| − | !align=left|Radius ( | + | !align=left| Radius (yards) |
| − | |2||2 2/3||3 1/3||4||4 2/3||5 1/3||6||6 2/3||7 1/3||8 | + | | 2 || 2 2/3 || 3 1/3 || 4 || 4 2/3 || 5 1/3 || 6 || 6 2/3 || 7 1/3 || 8 || 8 2/3 || 9 1/3 || 10 || 10 2/3 || 11 1/3 || 12 || 12 2/3 || 13 1/3 || 14 || 14 2/3 |
|} | |} | ||
| − | + | {{Levels 21-40}} | |
| − | {{Levels | ||
|- | |- | ||
| − | !align=left|Radius ( | + | !align=left| Radius (yards) |
| − | | | + | | 15 1/3 || 16 || 16 2/3 || 17 1/3 || 18 || 18 2/3 || 19 1/3 || 20 || 20 2/3 || 21 1/3 || 22 || 22 2/3 || 23 1/3 || 24 || 24 2/3 || 25 1/3 || 26 || 26 2/3 || 27 1/3 || 28 |
|} | |} | ||
| − | + | {{Levels 41-60}} | |
| − | {{Levels | ||
|- | |- | ||
| − | !align=left|Radius ( | + | !align=left| Radius (yards) |
| − | | | + | | 28 2/3 || 29 1/3 || 30 || 30 2/3 || 31 1/3 || 32 || 32 2/3 || 33 1/3 || 34 || 34 2/3 || 35 1/3 || 36 || 36 2/3 || 37 1/3 || 38 || 38 2/3 || 39 1/3 || 40 || 40 2/3 || 41 1/3 |
|} | |} | ||
| + | <br/> | ||
| − | + | ==Level 1-60 (D2R)== | |
| − | {{Levels | + | {{Levels 1-20}} |
|- | |- | ||
| − | !align=left|Radius ( | + | !align=left| Radius (yards) |
| − | | | + | | 4 || 4 2/3 || 5 1/3 || 6 || 6 2/3 || 7 1/3 || 8 || 8 2/3 || 9 1/3 || 10 || 10 2/3 || 11 1/3 || 12 || 12 2/3 || 13 1/3 || 14 || 14 2/3 || 15 1/3 || 16 || 16 2/3 |
| − | | | ||
| − | |||
| − | |||
| − | |||
|- | |- | ||
| − | !align=left| | + | !align=left| - Attack rate |
| − | | | + | | 11 || 20 || 27 || 33 || 37 || 41 || 44 || 46 || 49 || 51 || 53 || 54 || 56 || 57 || 58 || 60 || 60 || 61 || 62 || 63 |
| − | | | ||
| − | |||
| − | |||
| − | |||
|- | |- | ||
| − | !align=left| | + | !align=left| -% Movement speed |
| − | | | + | | 11 || 20 || 27 || 33 || 37 || 41 || 44 || 46 || 49 || 51 || 53 || 54 || 56 || 57 || 58 || 60 || 60 || 61 || 62 || 63 |
|} | |} | ||
| − | |||
| − | + | {{Levels 21-40}} | |
| − | {{Levels | ||
|- | |- | ||
| − | !align=left|Radius ( | + | !align=left| Radius (yards) |
| − | | | + | | 17 1/3 || 18 || 18 2/3 || 19 1/3 || 20 || 20 2/3 || 21 1/3 || 22 || 22 2/3 || 23 1/3 || 24 || 24 2/3 || 25 1/3 || 26 || 26 2/3 || 27 1/3 || 28 || 28 2/3 || 29 1/3 || 30 |
| − | | | ||
| − | |||
| − | |||
| − | |||
|- | |- | ||
| − | !align=left| | + | !align=left| - Attack rate |
| − | | | + | | 63 || 64 || 65 || 66 || 66 || 66 || 67 || 67 || 68 || 68 || 69 || 69 || 69 || 69 || 69 || 70 || 70 || 71 || 71 || 71 |
| − | | | ||
| − | |||
| − | |||
| − | |||
|- | |- | ||
| − | !align=left| | + | !align=left| -% Movement speed |
| − | | | + | | 63 || 64 || 65 || 66 || 66 || 66 || 67 || 67 || 68 || 68 || 69 || 69 || 69 || 69 || 69 || 70 || 70 || 71 || 71 || 71 |
|} | |} | ||
| − | + | {{Levels 41-60}} | |
| − | {{Levels | ||
|- | |- | ||
| − | !align=left|Radius ( | + | !align=left| Radius (yards) |
| − | | | + | | 30 2/3 || 31 1/3 || 32 || 32 2/3 || 33 1/3 || 34 || 34 2/3 || 35 1/3 || 36 || 36 2/3 || 37 1/3 || 38 || 38 2/3 || 39 1/3 || 40 || 40 2/3 || 41 1/3 || 42 || 42 2/3 || 43 1/3 |
| − | | | ||
| − | |||
| − | |||
| − | |||
|- | |- | ||
| − | !align=left| | + | !align=left| - Attack rate |
| − | | | + | | 71 || 72 || 72 || 72 || 72 || 72 || 72 || 72 || 73 || 73 || 73 || 73 || 73 || 74 || 74 || 74 || 74 || 74 || 74 || 75 |
| − | | | ||
| − | |||
| − | |||
| − | |||
|- | |- | ||
| − | !align=left| | + | !align=left| -% Movement speed |
| − | | | + | | 71 || 72 || 72 || 72 || 72 || 72 || 72 || 72 || 73 || 73 || 73 || 73 || 73 || 74 || 74 || 74 || 74 || 74 || 74 || 75 |
|} | |} | ||
<br/> | <br/> | ||
Latest revision as of 18:50, 4 August 2025
This skill allows the Barbarian to fashion a totem out of the carcass of his slain enemies. The resulting talisman serves as a grave warning to all of the minions of the Prime Evils. The mere sight of the Totem causes monsters to flee in terror. With additional training the warrior can increase the potency of the ward.
Detail
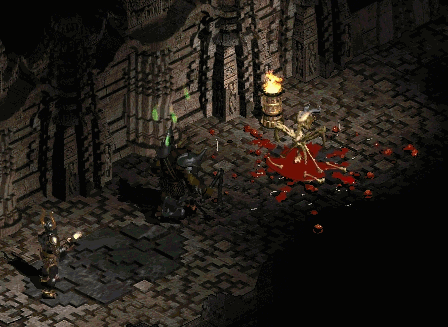
 Eligible targets like this Death Lord flee from the Barbarian, not the ward.
SourceSkill bonus
Charges
Charged suffix
Level 1-60 (LoD)
Level 1-60 (D2R)
Reference
|
||||||||||||||||||||||||||||||||||||||||||||||||||||||||||||||||||||||||||||||||||||||||||||||||||||||||||||||||||||||||||||||||||||||||||||||||||||||||||||||||||||||||||||||||||||||||||||||||||||||||||||||||||||||||||||||||||||||||||||||||||||||||||||||||||||||||||||||||||||||||||||||||||||||||||||||||||||||||||||||||||||||||||||||||||||||||||||||||||||||||||||||||||||||||||||||||||||||||||||||||||||||||||||||||||||||||||||||||||||||||||||||||||||||||||||||||||||||||||||||||||||||||||||||||||||||||||||||||||||||||||||||||||||||||||||||||||||||||||||||||||||||||||||||||||||||||||||||||||||||||||||||||||||||||||||||||||||||||||||||||||||||||||||||||||||||||||||||||


