Difference between revisions of "Chosen"
Onderduiker (talk | contribs) m (→Sources: Replaced defunct links with archive links) |
|||
| (70 intermediate revisions by 2 users not shown) | |||
| Line 1: | Line 1: | ||
| − | [ | + | {|cellpadding=0 cellspacing=0 width=100% span class=plainlinks |
| − | [ | + | | |
| − | + | [[Warhammer Online]] >> Destruction >> Chaos >> [[Chosen]] | |
| + | __NoToC__ | ||
| − | ''"My name? Long ago, such worthless details fell from memory. I know only the lust for glorious battle - for blood, for victory! I seek only the Eye of Tzeentch - his favour, his grace, his Dark Gifts - that through them, I may be remade - reborn! Why do we raid your lands? Why do we burn your homes? Why do we flay your flesh? To serve the Lord of Change and his magnificent designs."'' - An unknown Chosen of Tzeentch | + | <font color=brown>''"My name? Long ago, such worthless details fell from memory. I know only the lust for glorious battle - for blood, for victory! I seek only the Eye of Tzeentch - his favour, his grace, his Dark Gifts - that through them, I may be remade - reborn! Why do we raid your lands? Why do we burn your homes? Why do we flay your flesh? To serve the Lord of Change and his magnificent designs."''</font><br> |
| + | - An unknown Chosen of Tzeentch | ||
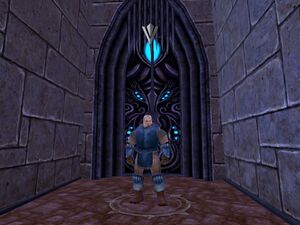
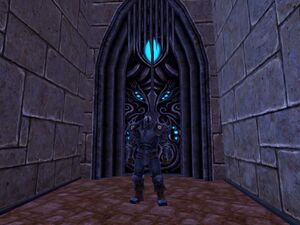
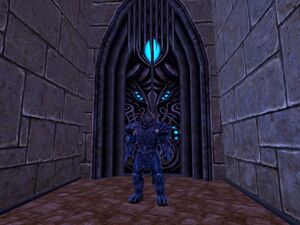
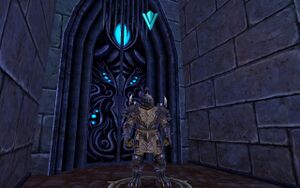
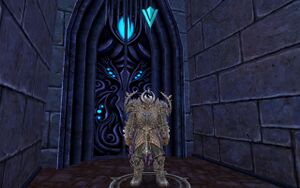
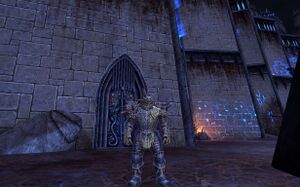
| − | A Chosen Champion of Tzeentch is a sight to behold - warped by the blessings of the dark gods, these hulking behemoths have the power and size to match even the mightiest of mortal creatures. Their thick Chaos armor can ward off the most punishing of blows, while the fell weapons they wield can cleave the heaviest of defenses. However, these "blessings" come at a price - the Chosen is beholden to Tzeentch, and must constantly strive to earn his favor. For the Chosen of Tzeentch this means more than mere slaughter and death. In order to earn the grace of the Changer of Ways, the Chosen must apply guile and trickery as much as brute force. Only through careful planning and deliberate carnage can a Chosen of Tzeentch truly find the favor of their god. | + | A Chosen Champion of Tzeentch is a sight to behold - warped by the blessings of the dark gods, these hulking behemoths have the power and size to match even the mightiest of mortal creatures. Their thick Chaos armor can ward off the most punishing of blows, while the fell weapons they wield can cleave the heaviest of defenses. However, these "blessings" come at a price - the Chosen is beholden to Tzeentch, and must constantly strive to earn his favor. For the Chosen of Tzeentch this means more than mere slaughter and death. In order to earn the grace of the Changer of Ways, the Chosen must apply guile and trickery as much as brute force. Only through careful planning and deliberate carnage can a Chosen of Tzeentch truly find the favor of their god. |
| Line 47: | Line 49: | ||
*Ornate and brightly adorned heavy armor made of strange, curving components decorated with the colors and marks of Tzeentch. | *Ornate and brightly adorned heavy armor made of strange, curving components decorated with the colors and marks of Tzeentch. | ||
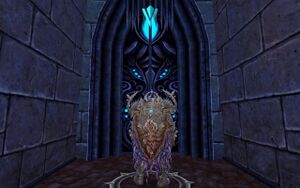
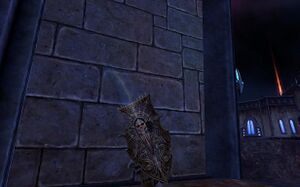
*Uses heavy shields bearing the crest and symbols of the Raven God. | *Uses heavy shields bearing the crest and symbols of the Raven God. | ||
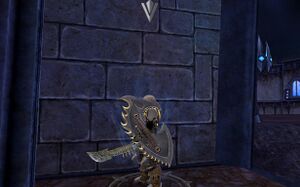
| − | *Wields massive melee weapons that crackle with ruinous power at high levels. | + | *Wields massive melee weapons that crackle with ruinous power at high levels. |
| − | |||
| − | |||
| − | |||
| − | |||
| − | |||
| − | |||
| − | |||
| − | |||
| − | |||
| − | |||
| − | |||
| − | |||
| − | |||
| − | |||
| − | |||
| − | |||
{| align=right style="border: 0px groove red; padding: 0px; margin: 0px" | {| align=right style="border: 0px groove red; padding: 0px; margin: 0px" | ||
| Line 78: | Line 64: | ||
The Chosen have been blessed by Tzeentch with several dark gifts, powers of Chaos which they can grasp and pull into this world through their very bodies. These powers pour forth from within their massive armor, and spill out as profane auras. In addition to causing an immediate effect when they first burst out from the Chosen's grasp, these lingering effects will continue to empower the player for several moments, allowing them to unleash melee attacks fueled by the unholy power of Tzeentch himself. | The Chosen have been blessed by Tzeentch with several dark gifts, powers of Chaos which they can grasp and pull into this world through their very bodies. These powers pour forth from within their massive armor, and spill out as profane auras. In addition to causing an immediate effect when they first burst out from the Chosen's grasp, these lingering effects will continue to empower the player for several moments, allowing them to unleash melee attacks fueled by the unholy power of Tzeentch himself. | ||
| − | {| class="collapsible collapsed wikitable" style="background:#cccccc; border:solid grey 1px; text-align:center;" | + | {| class="mw-collapsible mw-collapsed wikitable" style="background:#cccccc; border:solid grey 1px; text-align:center;" |
! '''Core Abilities''' | ! '''Core Abilities''' | ||
|- | |- | ||
| Line 86: | Line 72: | ||
! scope="col" width="50" | Rank | ! scope="col" width="50" | Rank | ||
! scope="col" width="50" | Cost | ! scope="col" width="50" | Cost | ||
| − | ! | + | ! Cast Time |
| − | ! | + | ! Description |
|- | |- | ||
| − | | Auto attack || 1 || 30 AP || Instant || Attack with your melee or ranged weapon | + | | Auto attack || 1 || 30 AP || Instant || align="left" | Attack with your melee or ranged weapon |
|- | |- | ||
| − | | Bulwark || || || || repairs a friendly keep door for 5% of it's total health over 15 seconds | + | | Bulwark || || || || align="left" | repairs a friendly keep door for 5% of it's total health over 15 seconds |
|- | |- | ||
| − | | Challenge || 20 || 20AP || Instant || you challenge all opponents in front of you, forcing monsters to attack you. While challenged, your opponents will deal only 70% damage to everyone other than you. This effect will fade after 15 seconds or after your opponent has hit you 3 times | + | | Challenge || 20 || 20AP || Instant || align="left" | you challenge all opponents in front of you, forcing monsters to attack you. While challenged, your opponents will deal only 70% damage to everyone other than you. This effect will fade after 15 seconds or after your opponent has hit you 3 times |
|- | |- | ||
| − | | Deflect oil || || || || Channeled 10% reduction in damage taken by oil siege engines. You will also protect two other group mates within 30 feet. Only one effect of this type may be on a player at a time | + | | Deflect oil || || || || align="left" | Channeled 10% reduction in damage taken by oil siege engines. You will also protect two other group mates within 30 feet. Only one effect of this type may be on a player at a time |
|- | |- | ||
| − | | Flee || 1 || All AP || instant || | + | | Flee || 1 || All AP || instant || align="left" | you run away from battle in a mad panic. Increasing your eun speed by 30% for 10 seconds. You immediately loose all of your actions points, any career mechanic points, and your moral will begin to drop, and you will not begin to regain action points until 10 seconds have past |
|- | |- | ||
| − | | Guard || 10 || None || Instant || | + | | Guard || 10 || None || Instant || align="left" | you defend one of your groupmates and try to take attacks mention for them, as long as your within 30 feet of them any damage they suffer will be split evenly between the 2 of you, and 35% of all hate they cause will be redirected to you |
|- | |- | ||
| − | | Hold The Line || 10 || 20 AP || Instant || | + | | Hold The Line || 10 || 20 AP || Instant || align="left" | You focus your defenses against enemy fire, increasing your chance to dodge and disrupt by 45% for 12 seconds. you will also defend all allies behind you, up to 40 feed away, increasing their chances to dodge and disrupt by 15% as long as they remain at your back. Allies may have this effect stacked on them up to 3 times ''this effect will end if you break your concentration , or run out of action points'' |
|- | |- | ||
| − | | Juggernaut || 18 || 45 AP || Instant || | + | | Juggernaut || 18 || 45 AP || Instant || align="left" | You become filled with unstoppable power, removing all snaring, rooting, stunning, and disarming effects. |
|- | |- | ||
| − | | Modify siege engine || || || || | + | | Modify siege engine || || || || align="left" | Siege targeted buff. Decreases the cool down times of that siege engine by 50% for 30 seconds. Does not work on rams or oil |
|- | |- | ||
| − | | Petrify || 30 || 30 AP || Instant || | + | | Petrify || 30 || 30 AP || Instant || align="left" | The land around you warps and changes, encasing up to 4 nearby opponents in hardened stone. effected opponents are rooted for 10 seconds and cannot move. Rooted targets have a 50% chance to break free when they suffer any damage. |
|- | |- | ||
| − | | Sever blessing || 22 || 25 AP || instant || | + | | Sever blessing || 22 || 25 AP || instant || align="left" | You sever one Blessing from your enemy and do 10 damage |
|- | |- | ||
| − | | Taunt || 7 || 20 AP || Instant || | + | | Taunt || 7 || 20 AP || Instant || align="left" | You enrage your opponent, interrupting any currently building abilities and forcing monsters to attack you. While taunted your opponent will take 30% more damage from your attacks. This effect will fade after 15 seconds or after your opponent has hit you 3 times |
|- | |- | ||
| − | | Throwing axe || 1 || 20 AP || 1s || A basic throwing attack that inflicts 10 damage. Has a chance to deal 90 damage to a severely wounded target if you are behind them. | + | | Throwing axe || 1 || 20 AP || 1s || align="left" | A basic throwing attack that inflicts 10 damage. Has a chance to deal 90 damage to a severely wounded target if you are behind them. |
|- | |- | ||
|} | |} | ||
| Line 128: | Line 114: | ||
The Path of Dread is focused on directly and brutally crushing your foes. A master of Dread will be likely to favor a Greatweapon instead of a shield, greatly increasing their offensive power at the cost of sacrificing the protections that a shield would otherwise offer. They will be easily capable of picking up a shield when the situation calls for it...but they won't be happy about it. | The Path of Dread is focused on directly and brutally crushing your foes. A master of Dread will be likely to favor a Greatweapon instead of a shield, greatly increasing their offensive power at the cost of sacrificing the protections that a shield would otherwise offer. They will be easily capable of picking up a shield when the situation calls for it...but they won't be happy about it. | ||
| − | {| class="collapsible collapsed wikitable" style="background:#cccccc; border:solid grey 1px; text-align:center;" | + | {| class="mw-collapsible mw-collapsed wikitable" style="background:#cccccc; border:solid grey 1px; text-align:center;" |
! '''Dread Abilities''' | ! '''Dread Abilities''' | ||
|- | |- | ||
| Line 152: | Line 138: | ||
The Path of Corruption is a cunning Mastery for those who prefer to outlast their enemies, letting their foes beat in futility on a massive shield until they're exhausted, and then crushing them with deliberate and vicious attacks. A specialist in Corruption will be the person who defines where the lines of battle will be drawn, since they -are- the front lines. | The Path of Corruption is a cunning Mastery for those who prefer to outlast their enemies, letting their foes beat in futility on a massive shield until they're exhausted, and then crushing them with deliberate and vicious attacks. A specialist in Corruption will be the person who defines where the lines of battle will be drawn, since they -are- the front lines. | ||
| − | {| class="collapsible collapsed wikitable" style="background:#cccccc; border:solid grey 1px; text-align:center;" | + | {| class="mw-collapsible mw-collapsed wikitable" style="background:#cccccc; border:solid grey 1px; text-align:center;" |
! '''Corruption Abilities''' | ! '''Corruption Abilities''' | ||
|- | |- | ||
| Line 176: | Line 162: | ||
The Path of Discord is one that delves more deeply into Tzeentch's gifts, and masters of Discord more fully understand how to manipulate the Chaos forces that swirl within them. They can unleash blasts of magical power, or twist the magical energies to unnaturally enhance their melee attacks. Their understanding of the nature of magic is still relatively shallow, however, and they can not hope to approach the skill or power of a true magus, but even their brief flashes of otherworldly energy are enough to empower them as potent melee combatants. | The Path of Discord is one that delves more deeply into Tzeentch's gifts, and masters of Discord more fully understand how to manipulate the Chaos forces that swirl within them. They can unleash blasts of magical power, or twist the magical energies to unnaturally enhance their melee attacks. Their understanding of the nature of magic is still relatively shallow, however, and they can not hope to approach the skill or power of a true magus, but even their brief flashes of otherworldly energy are enough to empower them as potent melee combatants. | ||
| − | {| class="collapsible collapsed wikitable" style="background:#cccccc; border:solid grey 1px; text-align:center;" | + | {| class="mw-collapsible mw-collapsed wikitable" style="background:#cccccc; border:solid grey 1px; text-align:center;" |
! '''Discord Abilities''' | ! '''Discord Abilities''' | ||
|- | |- | ||
| Line 298: | Line 284: | ||
===PVP: anti-bomb=== | ===PVP: anti-bomb=== | ||
| − | + | ||
| Line 309: | Line 295: | ||
==Guides== | ==Guides== | ||
| − | {| class="collapsible collapsed wikitable" style="background:#cccccc; border:solid grey 1px; text-align:center;" | + | {| class="mw-collapsible mw-collapsed wikitable" style="background:#cccccc; border:solid grey 1px; text-align:center;" |
! '''Armor Guide''' | ! '''Armor Guide''' | ||
|- | |- | ||
| Line 321: | Line 307: | ||
completing these sets gives the title "Captain of Consignments" | completing these sets gives the title "Captain of Consignments" | ||
| − | ====Tracker’s==== | + | |
| + | ====<u>Tracker’s</u>==== | ||
| + | |||
[[image:Trackers.jpg|thumb|Trackers armor set]] | [[image:Trackers.jpg|thumb|Trackers armor set]] | ||
| + | |||
This Set obtained by completing a series of quests located throughout ''tier 2'' | This Set obtained by completing a series of quests located throughout ''tier 2'' | ||
| Line 350: | Line 339: | ||
| − | {| class="collapsible collapsed wikitable" style="background:#cccccc; border:solid grey 1px; text-align:center;" | + | {| class="mw-collapsible mw-collapsed wikitable" style="background:#cccccc; border:solid grey 1px; text-align:center;" |
! '''Tracker's Accursed Defender Kit''' | ! '''Tracker's Accursed Defender Kit''' | ||
|- | |- | ||
| Line 400: | Line 389: | ||
---- | ---- | ||
| − | ====Stalker’s==== | + | ====<u>Stalker’s</u>==== |
This set is obtained by completing a series of quests located throughout ''tier 3'' | This set is obtained by completing a series of quests located throughout ''tier 3'' | ||
| Line 439: | Line 428: | ||
| − | {| style="background:#cccccc; border:solid grey 1px; text-align:center;" | + | {| class="mw-collapsible mw-collapsed wikitable" style="background:#cccccc; border:solid grey 1px; text-align:center;" |
! '''Stalker's Accursed Defender Kit ''' | ! '''Stalker's Accursed Defender Kit ''' | ||
|- | |- | ||
| Line 502: | Line 491: | ||
Completing these sets gives the title ??? | Completing these sets gives the title ??? | ||
| − | ====Keeper’s==== | + | |
| + | ====<u>Keeper’s</u>==== | ||
dropped from wing bosses in the Sacellum. | dropped from wing bosses in the Sacellum. | ||
| Line 520: | Line 510: | ||
Keeper's Gloves are dropped by any of the three end bosses in The Sacellum Dungeon in addition to the other set pieces with roughly a 50% chance. | Keeper's Gloves are dropped by any of the three end bosses in The Sacellum Dungeon in addition to the other set pieces with roughly a 50% chance. | ||
| − | {| style="background:#cccccc; border:solid grey 1px; text-align:center;" | + | {| class="mw-collapsible mw-collapsed wikitable" style="background:#cccccc; border:solid grey 1px; text-align:center;" |
! '''Keeper's Accursed Defender Kit''' | ! '''Keeper's Accursed Defender Kit''' | ||
|- | |- | ||
| Line 555: | Line 545: | ||
|} | |} | ||
|} | |} | ||
| + | |||
<!--Back to top button--> | <!--Back to top button--> | ||
| Line 568: | Line 559: | ||
---- | ---- | ||
| − | ====Redeye==== | + | ====<u>Redeye</u>==== |
dropped from wing bosses in Mt. Gunbad. | dropped from wing bosses in Mt. Gunbad. | ||
| Line 595: | Line 586: | ||
| − | {| style="background:#cccccc; border:solid grey 1px; text-align:center" | + | {| class="mw-collapsible mw-collapsed wikitable" style="background:#cccccc; border:solid grey 1px; text-align:center;" |
! '''Redeye Accursed Defender Kit''' | ! '''Redeye Accursed Defender Kit''' | ||
|- | |- | ||
| Line 657: | Line 648: | ||
---- | ---- | ||
| − | ====Bloodlord==== | + | ====<u>Bloodlord</u>==== |
This set gives lessor wards | This set gives lessor wards | ||
| Line 683: | Line 674: | ||
| − | {| style="background:#cccccc; border:solid grey 1px; text-align:center;" | + | {| class="mw-collapsible mw-collapsed wikitable" style="background:#cccccc; border:solid grey 1px; text-align:center;" |
! '''Bloodlord Accursed Defender''' | ! '''Bloodlord Accursed Defender''' | ||
|- | |- | ||
| Line 749: | Line 740: | ||
---- | ---- | ||
| − | ====Sentinel==== | + | ====<u>Sentinel</u>==== |
This set gives grater wards | This set gives grater wards | ||
| Line 782: | Line 773: | ||
| − | {| style="background:#cccccc; border:solid grey 1px; text-align:center;" | + | {| class="mw-collapsible mw-collapsed wikitable" style="background:#cccccc; border:solid grey 1px; text-align:center;" |
! '''Sentinel Accursed Defender Kit''' | ! '''Sentinel Accursed Defender Kit''' | ||
|- | |- | ||
| Line 797: | Line 788: | ||
!style="background:black; color:white;" | '''Total''' | !style="background:black; color:white;" | '''Total''' | ||
|- style="background:black; color:white;" | |- style="background:black; color:white;" | ||
| − | | align="left" | [[Image:Armor icon.jpg|Armor]] Armor || '''751''' || '''676''' || '''601''' || '''601''' || '''676''' || '''-''' || rowspan="15" | || ''' | + | | align="left" | [[Image:Armor icon.jpg|Armor]] Armor || '''751''' || '''676''' || '''601''' || '''601''' || '''676''' || '''-''' || rowspan="15" | || '''3305''' |
|- style="background:black; color:white;" | |- style="background:black; color:white;" | ||
| − | | align="left" | [[Image:Strength icon.jpg|Strength]] Strength || '''19''' || '''-''' || '''10''' || '''-''' || '''18''' || '''24''' || ''' | + | | align="left" | [[Image:Strength icon.jpg|Strength]] Strength || '''19''' || '''-''' || '''10''' || '''-''' || '''18''' || '''24''' || '''71''' |
|- style="background:black; color:white;" | |- style="background:black; color:white;" | ||
| − | | align="left" | [[Image:Willpower icon.jpg|Willpower]] Willpower || '''-''' || '''-''' || '''-''' || '''-''' || '''-''' || '''6''' || ''' | + | | align="left" | [[Image:Willpower icon.jpg|Willpower]] Willpower || '''-''' || '''-''' || '''-''' || '''-''' || '''-''' || '''6''' || '''6''' |
|- style="background:black; color:white;" | |- style="background:black; color:white;" | ||
| − | | align="left" | [[Image:Toughness icon.jpg|Toughness]] Toughness || '''35''' || '''17''' || '''16''' || '''27''' || '''32''' || '''18''' || ''' | + | | align="left" | [[Image:Toughness icon.jpg|Toughness]] Toughness || '''35''' || '''17''' || '''16''' || '''27''' || '''32''' || '''18''' || '''145''' |
|- style="background:black; color:white;" | |- style="background:black; color:white;" | ||
| − | | align="left" | [[Image:Wounds icon.jpg|Wounds]] Wounds || '''-''' || '''30''' || '''-''' || '''8''' || '''12''' || '''12''' || ''' | + | | align="left" | [[Image:Wounds icon.jpg|Wounds]] Wounds || '''-''' || '''30''' || '''-''' || '''8''' || '''12''' || '''12''' || '''62''' |
|- style="background:black; color:white;" | |- style="background:black; color:white;" | ||
| − | | align="left" | [[Image:Initiative icon.jpg|Initiative]] Initiative || '''-''' || '''12''' || '''-''' || '''-''' || '''-''' || '''-''' || ''' | + | | align="left" | [[Image:Initiative icon.jpg|Initiative]] Initiative || '''-''' || '''12''' || '''-''' || '''-''' || '''-''' || '''-''' || '''12''' |
|- style="background:black; color:white;" | |- style="background:black; color:white;" | ||
| − | | align="left" | [[Image:Weapon skill icon.jpg|Weapon Skill]] Weapon Skill || '''13''' || '''-''' || '''27''' || '''12''' || '''-''' || '''-''' || ''' | + | | align="left" | [[Image:Weapon skill icon.jpg|Weapon Skill]] Weapon Skill || '''13''' || '''-''' || '''27''' || '''12''' || '''-''' || '''-''' || '''52''' |
|- style="background:black; color:white;" | |- style="background:black; color:white;" | ||
| − | | align="left" | [[Image:Bulletpoint icon.jpg|Hit Points Every 4 Seconds]] Hit Points Every 4 Seconds || '''56''' || '''-''' || '''-''' || '''-''' || '''-''' || '''-''' || ''' | + | | align="left" | [[Image:Bulletpoint icon.jpg|Hit Points Every 4 Seconds]] Hit Points Every 4 Seconds || '''56''' || '''-''' || '''-''' || '''-''' || '''-''' || '''-''' || '''56''' |
|- style="background:black; color:white;" | |- style="background:black; color:white;" | ||
| − | | align="left" | [[Image:Bulletpoint icon.jpg|Reduction In Being Critically Hit]] Reduction In Being Critically Hit || '''-''' || '''-''' || '''-''' || '''-''' || '''3%''' || '''-''' || ''' | + | | align="left" | [[Image:Bulletpoint icon.jpg|Reduction In Being Critically Hit]] Reduction In Being Critically Hit || '''-''' || '''-''' || '''-''' || '''-''' || '''3%''' || '''-''' || '''3%''' |
|- style="background:black; color:white;" | |- style="background:black; color:white;" | ||
| − | | align="left" | [[Image:Melee power icon.jpg|Melee Power]] Melee Power || '''-''' || '''-''' || '''21''' || '''-''' || '''-''' || '''-''' || ''' | + | | align="left" | [[Image:Melee power icon.jpg|Melee Power]] Melee Power || '''-''' || '''-''' || '''21''' || '''-''' || '''-''' || '''-''' || '''21''' |
|- style="background:black; color:white;" | |- style="background:black; color:white;" | ||
| − | | align="left" | [[Image:Block_icon.jpg|Block]] Block || '''-''' || '''2%''' || '''-''' || '''-''' || '''-''' || '''-''' || ''' | + | | align="left" | [[Image:Block_icon.jpg|Block]] Block || '''-''' || '''2%''' || '''-''' || '''-''' || '''-''' || '''-''' || '''2%''' |
|- style="background:black; color:white;" | |- style="background:black; color:white;" | ||
| − | | align="left" | [[Image:Dodge icon.jpg|Dodge]] Dodge || '''-''' || '''-''' || '''-''' || '''2%''' || '''-''' || '''-''' || ''' | + | | align="left" | [[Image:Dodge icon.jpg|Dodge]] Dodge || '''-''' || '''-''' || '''-''' || '''2%''' || '''-''' || '''-''' || '''2%''' |
|- style="background:black; color:white;" | |- style="background:black; color:white;" | ||
| − | | align="left" | [[Image:Spiritual resist icon.jpg|Spiritual Resistance]] Spiritual Resistance || '''-''' || '''-''' || '''-''' || '''-''' || '''-''' || '''74''' || ''' | + | | align="left" | [[Image:Spiritual resist icon.jpg|Spiritual Resistance]] Spiritual Resistance || '''-''' || '''-''' || '''-''' || '''-''' || '''-''' || '''74''' || '''74''' |
|- style="background:black; color:white;" | |- style="background:black; color:white;" | ||
| − | | align="left" | [[Image:Elemental resist icon.jpg|Elemental Resistance]] Elemental Resistance || '''-''' || '''-''' || '''-''' || '''-''' || '''-''' || '''82''' || ''' | + | | align="left" | [[Image:Elemental resist icon.jpg|Elemental Resistance]] Elemental Resistance || '''-''' || '''-''' || '''-''' || '''-''' || '''-''' || '''82''' || '''82''' |
|- style="background:black; color:white;" | |- style="background:black; color:white;" | ||
| − | | align="left" | [[Image:Corporeal resist icon.jpg|Corporeal Resistance]] Corporeal Resistance || '''-''' || '''-''' || '''-''' || '''-''' || '''-''' || '''79''' || ''' | + | | align="left" | [[Image:Corporeal resist icon.jpg|Corporeal Resistance]] Corporeal Resistance || '''-''' || '''-''' || '''-''' || '''-''' || '''-''' || '''79''' || '''79''' |
|- style="background:black; color:white;" | |- style="background:black; color:white;" | ||
| colspan="9" | '''Set Bonuses''' | | colspan="9" | '''Set Bonuses''' | ||
| Line 859: | Line 850: | ||
---- | ---- | ||
| − | ====Dark Promise==== | + | ====<u>Dark Promise</u>==== |
[[image:Darkpromise.jpg | thumb | Darkpromise Armor Set]] | [[image:Darkpromise.jpg | thumb | Darkpromise Armor Set]] | ||
| Line 891: | Line 882: | ||
| − | {| style="background:#cccccc; border:solid grey 1px; text-align:center;" | + | {| class="mw-collapsible mw-collapsed wikitable" style="background:#cccccc; border:solid grey 1px; text-align:center;" |
! '''Dark Promise Accursed Defender kit''' | ! '''Dark Promise Accursed Defender kit''' | ||
|- | |- | ||
| Line 906: | Line 897: | ||
!style="background:black; color:white;" | '''Total''' | !style="background:black; color:white;" | '''Total''' | ||
|- style="background:black; color:white;" | |- style="background:black; color:white;" | ||
| − | | align="left" | [[Image:Armor icon.jpg|Armor]] Armor || '''827''' || '''744''' || '''661''' || '''661''' || '''744''' || '''-''' || rowspan="15" | || ''' | + | | align="left" | [[Image:Armor icon.jpg|Armor]] Armor || '''827''' || '''744''' || '''661''' || '''661''' || '''744''' || '''-''' || rowspan="15" | || '''3637''' |
|- style="background:black; color:white;" | |- style="background:black; color:white;" | ||
| − | | align="left" | [[Image:Strength icon.jpg|Strength]] Strength || '''19''' || '''-''' || '''14''' || '''-''' || '''17''' || '''26''' || ''' | + | | align="left" | [[Image:Strength icon.jpg|Strength]] Strength || '''19''' || '''-''' || '''14''' || '''-''' || '''17''' || '''26''' || '''76''' |
|- style="background:black; color:white;" | |- style="background:black; color:white;" | ||
| − | | align="left" | [[Image:Willpower icon.jpg|Willpower]] Willpower || '''-''' || '''-''' || '''-''' || '''-''' || '''-''' || '''7''' || ''' | + | | align="left" | [[Image:Willpower icon.jpg|Willpower]] Willpower || '''-''' || '''-''' || '''-''' || '''-''' || '''-''' || '''7''' || '''7''' |
|- style="background:black; color:white;" | |- style="background:black; color:white;" | ||
| − | | align="left" | [[Image:Toughness icon.jpg|Toughness]] Toughness || '''42''' || '''19''' || '''9''' || '''33''' || '''38''' || '''20''' || ''' | + | | align="left" | [[Image:Toughness icon.jpg|Toughness]] Toughness || '''42''' || '''19''' || '''9''' || '''33''' || '''38''' || '''20''' || '''161''' |
|- style="background:black; color:white;" | |- style="background:black; color:white;" | ||
| − | | align="left" | [[Image:Wounds icon.jpg|Wounds]] Wounds || '''-''' || '''38''' || '''-''' || '''11''' || '''10''' || '''13''' || ''' | + | | align="left" | [[Image:Wounds icon.jpg|Wounds]] Wounds || '''-''' || '''38''' || '''-''' || '''11''' || '''10''' || '''13''' || '''72''' |
|- style="background:black; color:white;" | |- style="background:black; color:white;" | ||
| − | | align="left" | [[Image:Initiative icon.jpg|Initiative]] Initiative || '''-''' || '''13''' || '''-''' || '''-''' || '''-''' || '''-''' || ''' | + | | align="left" | [[Image:Initiative icon.jpg|Initiative]] Initiative || '''-''' || '''13''' || '''-''' || '''-''' || '''-''' || '''-''' || '''13''' |
|- style="background:black; color:white;" | |- style="background:black; color:white;" | ||
| − | | align="left" | [[Image:Weapon skill icon.jpg|Weapon Skill]] Weapon Skill || '''13''' || '''-''' || '''33''' || '''15''' || '''-''' || '''-''' || ''' | + | | align="left" | [[Image:Weapon skill icon.jpg|Weapon Skill]] Weapon Skill || '''13''' || '''-''' || '''33''' || '''15''' || '''-''' || '''-''' || '''61''' |
|- style="background:black; color:white;" | |- style="background:black; color:white;" | ||
| − | | align="left" | [[Image:Bulletpoint icon.jpg|AP Per Second]] AP Per Second || '''3''' || '''-''' || '''-''' || '''-''' || '''-''' || '''-''' || ''' | + | | align="left" | [[Image:Bulletpoint icon.jpg|AP Per Second]] AP Per Second || '''3''' || '''-''' || '''-''' || '''-''' || '''-''' || '''-''' || '''3''' |
|- style="background:black; color:white;" | |- style="background:black; color:white;" | ||
| − | | align="left" | [[Image:Bulletpoint icon.jpg|Morale Per Second]] Morale Per Second || '''-''' || '''-''' || '''3''' || '''-''' || '''-''' || '''-''' || ''' | + | | align="left" | [[Image:Bulletpoint icon.jpg|Morale Per Second]] Morale Per Second || '''-''' || '''-''' || '''3''' || '''-''' || '''-''' || '''-''' || '''3''' |
|- style="background:black; color:white;" | |- style="background:black; color:white;" | ||
| − | | align="left" | [[Image:Melee crit icon.jpg|Reduced Armor Penetration]] Reduced Armor Penetration || '''-''' || '''2%''' || '''-''' || '''-''' || '''-''' || '''-''' || ''' | + | | align="left" | [[Image:Melee crit icon.jpg|Reduced Armor Penetration]] Reduced Armor Penetration || '''-''' || '''2%''' || '''-''' || '''-''' || '''-''' || '''-''' || '''2%''' |
|- style="background:black; color:white;" | |- style="background:black; color:white;" | ||
| − | | align="left" | [[Image:Melee crit icon.jpg|Melee Critical Chance]] Melee Critical Chance || '''-''' || '''-''' || '''-''' || '''3%''' || '''-''' || '''-''' || ''' | + | | align="left" | [[Image:Melee crit icon.jpg|Melee Critical Chance]] Melee Critical Chance || '''-''' || '''-''' || '''-''' || '''3%''' || '''-''' || '''-''' || '''3%''' |
|- style="background:black; color:white;" | |- style="background:black; color:white;" | ||
| − | | align="left" | [[Image:Disrupt_icon.jpg|Disrupt]] Disrupt || '''-''' || '''-''' || '''-''' || '''-''' || '''2%''' || '''-''' || ''' | + | | align="left" | [[Image:Disrupt_icon.jpg|Disrupt]] Disrupt || '''-''' || '''-''' || '''-''' || '''-''' || '''2%''' || '''-''' || '''2%''' |
|- style="background:black; color:white;" | |- style="background:black; color:white;" | ||
| − | | align="left" | [[Image:Spiritual resist icon.jpg|Spiritual Resistance]] Spiritual Resistance || '''-''' || '''-''' || '''-''' || '''-''' || '''-''' || '''85''' || ''' | + | | align="left" | [[Image:Spiritual resist icon.jpg|Spiritual Resistance]] Spiritual Resistance || '''-''' || '''-''' || '''-''' || '''-''' || '''-''' || '''85''' || '''85''' |
|- style="background:black; color:white;" | |- style="background:black; color:white;" | ||
| − | | align="left" | [[Image:Elemental resist icon.jpg|Elemental Resistance]] Elemental Resistance || '''-''' || '''-''' || '''-''' || '''-''' || '''-''' || '''89''' || ''' | + | | align="left" | [[Image:Elemental resist icon.jpg|Elemental Resistance]] Elemental Resistance || '''-''' || '''-''' || '''-''' || '''-''' || '''-''' || '''89''' || '''89''' |
|- style="background:black; color:white;" | |- style="background:black; color:white;" | ||
| − | | align="left" | [[Image:Corporeal resist icon.jpg|Corporeal Resistance]] Corporeal Resistance || '''-''' || '''-''' || '''-''' || '''-''' || '''-''' || '''85''' || ''' | + | | align="left" | [[Image:Corporeal resist icon.jpg|Corporeal Resistance]] Corporeal Resistance || '''-''' || '''-''' || '''-''' || '''-''' || '''-''' || '''85''' || '''85''' |
|- style="background:black; color:white;" | |- style="background:black; color:white;" | ||
| colspan="9" | '''Set Bonuses''' | | colspan="9" | '''Set Bonuses''' | ||
| Line 974: | Line 965: | ||
Completion of these sets awards the "Natural Disaster" title | Completion of these sets awards the "Natural Disaster" title | ||
| − | ====Carnage==== | + | ====<u>Carnage</u>==== |
[[image:Carnage.jpg | thumb | Carnage armor set]] | [[image:Carnage.jpg | thumb | Carnage armor set]] | ||
| Line 984: | Line 975: | ||
! Greenskins | ! Greenskins | ||
|- | |- | ||
| − | |Suderholm | + | |Suderholm || '''-''' || '''-''' |
|- | |- | ||
| − | |The wilds of war | + | |The wilds of war || '''-''' || '''-''' |
|- | |- | ||
| − | |Fields of woe | + | |Fields of woe || '''-''' || '''-''' |
|} | |} | ||
| − | {| style="background:#cccccc; border:solid grey 1px; text-align:center;" | + | {| class="mw-collapsible mw-collapsed wikitable" style="background:#cccccc; border:solid grey 1px; text-align:center;" |
! '''Accursed Defender Kit of Carnage''' | ! '''Accursed Defender Kit of Carnage''' | ||
|- | |- | ||
| Line 1,003: | Line 994: | ||
!style="background:black; color:white;" | '''Total''' | !style="background:black; color:white;" | '''Total''' | ||
|- style="background:black; color:white;" | |- style="background:black; color:white;" | ||
| − | | align="left" | [[Image:Armor icon.jpg|Armor]] Armor || '''105''' || '''84''' ||rowspan="7" | || ''' | + | | align="left" | [[Image:Armor icon.jpg|Armor]] Armor || '''105''' || '''84''' ||rowspan="7" | || '''189''' |
|- style="background:black; color:white;" | |- style="background:black; color:white;" | ||
| − | | align="left" | [[Image:Strength icon.jpg|Strength]] Strength || '''-''' || '''5''' || ''' | + | | align="left" | [[Image:Strength icon.jpg|Strength]] Strength || '''-''' || '''5''' || '''5''' |
|- style="background:black; color:white;" | |- style="background:black; color:white;" | ||
| − | | align="left" | [[Image:Toughness icon.jpg|Toughness]] Toughness || '''5''' || '''4''' || ''' | + | | align="left" | [[Image:Toughness icon.jpg|Toughness]] Toughness || '''5''' || '''4''' || '''9''' |
|- style="background:black; color:white;" | |- style="background:black; color:white;" | ||
| − | | align="left" | [[Image:Wounds icon.jpg|Wounds]] Wounds || '''4''' || '''1''' || ''' | + | | align="left" | [[Image:Wounds icon.jpg|Wounds]] Wounds || '''4''' || '''1''' || '''5''' |
|- style="background:black; color:white;" | |- style="background:black; color:white;" | ||
| − | | align="left" | [[Image:Initiative icon.jpg|Initiative]] Initiative || '''2''' || '''-''' || ''' | + | | align="left" | [[Image:Initiative icon.jpg|Initiative]] Initiative || '''2''' || '''-''' || '''2''' |
|- style="background:black; color:white;" | |- style="background:black; color:white;" | ||
| − | | align="left" | [[Image:Weapon skill icon.jpg|Weapon Skill]] Weapon Skill || '''-''' || '''2''' || ''' | + | | align="left" | [[Image:Weapon skill icon.jpg|Weapon Skill]] Weapon Skill || '''-''' || '''2''' || '''2''' |
|- style="background:black; color:white;" | |- style="background:black; color:white;" | ||
| − | | align="left" | [[Image:Melee power icon.jpg|Melee Power]] Melee Power || '''3''' || '''-''' || ''' | + | | align="left" | [[Image:Melee power icon.jpg|Melee Power]] Melee Power || '''3''' || '''-''' || '''3''' |
|- style="background:black; color:white;" | |- style="background:black; color:white;" | ||
| colspan="5" | '''Set Bonuses''' | | colspan="5" | '''Set Bonuses''' | ||
| Line 1,038: | Line 1,029: | ||
---- | ---- | ||
| − | ====Havoc==== | + | ====<u>Havoc</u>==== |
obtained from T2 PQs | obtained from T2 PQs | ||
| Line 1,047: | Line 1,038: | ||
!Greenskins | !Greenskins | ||
|- | |- | ||
| − | | Bells of war | + | | Bells of war || '''-''' || '''-''' |
|- | |- | ||
| − | | Way shrine of Sigmar | + | | Way shrine of Sigmar || '''-''' || '''-''' |
|- | |- | ||
| − | ! Griffin outpost | + | ! Griffin outpost || '''-'''|| '''-''' |
|- | |- | ||
| − | | Plaguewood thicket | + | | Plaguewood thicket || '''-''' || '''-''' |
|} | |} | ||
| − | {| style="background:#cccccc; border:solid grey 1px; text-align:center;" | + | {| class="mw-collapsible mw-collapsed wikitable" style="background:#cccccc; border:solid grey 1px; text-align:center;" |
! '''Accursed Defender Kit of Havoc''' | ! '''Accursed Defender Kit of Havoc''' | ||
|- | |- | ||
| Line 1,069: | Line 1,060: | ||
!style="background:black; color:white;" | '''Total''' | !style="background:black; color:white;" | '''Total''' | ||
|- style="background:black; color:white;" | |- style="background:black; color:white;" | ||
| − | | align="left" | [[Image:Armor icon.jpg|Armor]] Armor || '''270''' || '''204''' || '''192''' || rowspan="8" | || ''' | + | | align="left" | [[Image:Armor icon.jpg|Armor]] Armor || '''270''' || '''204''' || '''192''' || rowspan="8" | || '''666''' |
|- style="background:black; color:white;" | |- style="background:black; color:white;" | ||
| − | | align="left" | [[Image:Strength icon.jpg|Strength]] Strength || '''-''' || '''11''' || '''-''' | '''-''' || ''' | + | | align="left" | [[Image:Strength icon.jpg|Strength]] Strength || '''-''' || '''11''' || '''-''' | '''-''' || '''11''' |
|- style="background:black; color:white;" | |- style="background:black; color:white;" | ||
| − | | align="left" | [[Image:Toughness icon.jpg|Toughness]] Toughness || '''12''' || '''7''' || '''9''' || ''' | + | | align="left" | [[Image:Toughness icon.jpg|Toughness]] Toughness || '''12''' || '''7''' || '''9''' || '''28''' |
|- style="background:black; color:white;" | |- style="background:black; color:white;" | ||
| − | | align="left" | [[Image:Wounds icon.jpg|Wounds]] Wounds || '''9''' || '''3''' || '''7''' || ''' | + | | align="left" | [[Image:Wounds icon.jpg|Wounds]] Wounds || '''9''' || '''3''' || '''7''' || '''19''' |
|- style="background:black; color:white;" | |- style="background:black; color:white;" | ||
| − | | align="left" | [[Image:Initiative icon.jpg|Initiative]] Initiative || '''3''' || '''-''' || '''-''' || ''' | + | | align="left" | [[Image:Initiative icon.jpg|Initiative]] Initiative || '''3''' || '''-''' || '''-''' || '''3''' |
|- style="background:black; color:white;" | |- style="background:black; color:white;" | ||
| − | | align="left" | [[Image:Weapon skill icon.jpg|Weapon Skill]] Weapon Skill || '''-''' || '''4''' || '''3''' || ''' | + | | align="left" | [[Image:Weapon skill icon.jpg|Weapon Skill]] Weapon Skill || '''-''' || '''4''' || '''3''' || '''7''' |
|- style="background:black; color:white;" | |- style="background:black; color:white;" | ||
| − | | align="left" | [[Image:Melee crit icon.jpg|Melee Critical Chance]] Melee Critical Chance || '''-''' || '''-''' || '''1''' || ''' | + | | align="left" | [[Image:Melee crit icon.jpg|Melee Critical Chance]] Melee Critical Chance || '''-''' || '''-''' || '''1%''' || '''1%''' |
|- style="background:black; color:white;" | |- style="background:black; color:white;" | ||
| − | | align="left" | [[Image:Disrupt_icon.jpg|Disrupt]] Disrupt || '''2%''' || '''-''' || '''-''' || ''' | + | | align="left" | [[Image:Disrupt_icon.jpg|Disrupt]] Disrupt || '''2%''' || '''-''' || '''-''' || '''2%''' |
|- style="background:black; color:white;" | |- style="background:black; color:white;" | ||
| colspan="7" | '''Set Bonuses''' | | colspan="7" | '''Set Bonuses''' | ||
| Line 1,108: | Line 1,099: | ||
---- | ---- | ||
| − | ====Mayhem==== | + | ====<u>Mayhem</u>==== |
[[image:Mayhem.jpg | thumb | Mayhem armor set]] | [[image:Mayhem.jpg | thumb | Mayhem armor set]] | ||
| Line 1,119: | Line 1,110: | ||
! Greenskin | ! Greenskin | ||
|- | |- | ||
| − | |Mudflats | + | |Mudflats || '''-''' || '''-''' |
|- | |- | ||
| − | |Serpents's Fang Bandits | + | |Serpents's Fang Bandits || '''-''' || '''-''' |
|- | |- | ||
| − | |Bitterspring | + | |Bitterspring || '''-''' || '''-''' |
|- | |- | ||
| − | |Tempest Horn | + | |Tempest Horn || '''-''' || '''-''' |
|- | |- | ||
| − | |Tower of the elves | + | |Tower of the elves || '''-''' || '''-''' |
|} | |} | ||
| − | {| style="background:#cccccc; border:solid grey 1px; text-align:center;" | + | {| class="mw-collapsible mw-collapsed wikitable" style="background:#cccccc; border:solid grey 1px; text-align:center;" |
! '''Accursed Defender Kit of Mayhem''' | ! '''Accursed Defender Kit of Mayhem''' | ||
|- | |- | ||
| Line 1,144: | Line 1,135: | ||
!style="background:black; color:white;" | '''Total''' | !style="background:black; color:white;" | '''Total''' | ||
|- style="background:black; color:white;" | |- style="background:black; color:white;" | ||
| − | | align="left" | [[Image:Armor icon.jpg|Armor]] Armor || '''436''' || '''392''' || '''336''' || '''324''' || rowspan="10" | || ''' | + | | align="left" | [[Image:Armor icon.jpg|Armor]] Armor || '''436''' || '''392''' || '''336''' || '''324''' || rowspan="10" | || '''1488''' |
|- style="background:black; color:white;" | |- style="background:black; color:white;" | ||
| − | | align="left" | [[Image:Strength icon.jpg|Strength]] Strength || '''13''' || '''11''' || '''-''' || '''-''' || ''' | + | | align="left" | [[Image:Strength icon.jpg|Strength]] Strength || '''13''' || '''11''' || '''-''' || '''-''' || '''24''' |
|- style="background:black; color:white;" | |- style="background:black; color:white;" | ||
| − | | align="left" | [[Image:Willpower icon.jpg|Willpower]] Willpower || '''-''' || '''-''' || '''-''' || '''6''' || ''' | + | | align="left" | [[Image:Willpower icon.jpg|Willpower]] Willpower || '''-''' || '''-''' || '''-''' || '''6''' || '''6''' |
|- style="background:black; color:white;" | |- style="background:black; color:white;" | ||
| − | | align="left" | [[Image:Toughness icon.jpg|Toughness]] Toughness || '''20''' || '''18''' || '''15''' || '''17''' || ''' | + | | align="left" | [[Image:Toughness icon.jpg|Toughness]] Toughness || '''20''' || '''18''' || '''15''' || '''17''' || '''70''' |
|- style="background:black; color:white;" | |- style="background:black; color:white;" | ||
| − | | align="left" | [[Image:Wounds icon.jpg|Wounds]] Wounds || '''-''' || '''7''' || '''10''' || '''7''' || ''' | + | | align="left" | [[Image:Wounds icon.jpg|Wounds]] Wounds || '''-''' || '''7''' || '''10''' || '''7''' || '''24''' |
|- style="background:black; color:white;" | |- style="background:black; color:white;" | ||
| − | | align="left" | [[Image:Initiative icon.jpg|Initiative]] Initiative || '''7''' || '''-''' || '''-''' || '''-''' || ''' | + | | align="left" | [[Image:Initiative icon.jpg|Initiative]] Initiative || '''7''' || '''-''' || '''-''' || '''-''' || '''7''' |
|- style="background:black; color:white;" | |- style="background:black; color:white;" | ||
| − | | align="left" | [[Image:Weapon skill icon.jpg|Weapon Skill]] Weapon Skill || '''-''' || '''-''' || '''6''' || '''8''' || ''' | + | | align="left" | [[Image:Weapon skill icon.jpg|Weapon Skill]] Weapon Skill || '''-''' || '''-''' || '''6''' || '''8''' || '''14''' |
|- style="background:black; color:white;" | |- style="background:black; color:white;" | ||
| − | | align="left" | [[Image:Bulletpoint icon.jpg|Hate Caused]] Hate Caused || '''-''' || '''10''' || '''-''' || '''-''' || ''' | + | | align="left" | [[Image:Bulletpoint icon.jpg|Hate Caused]] Hate Caused || '''-''' || '''10''' || '''-''' || '''-''' || '''10''' |
|- style="background:black; color:white;" | |- style="background:black; color:white;" | ||
| − | | align="left" | [[Image:Bulletpoint icon.jpg|Morale Per Second]] Morale Per Second || '''3''' || '''-''' || '''-''' || '''-''' || ''' | + | | align="left" | [[Image:Bulletpoint icon.jpg|Morale Per Second]] Morale Per Second || '''3''' || '''-''' || '''-''' || '''-''' || '''3''' |
|- style="background:black; color:white;" | |- style="background:black; color:white;" | ||
| − | | align="left" | [[Image:Melee power icon.jpg|Melee Power]] Melee Power || '''-''' || '''-''' || '''12''' || '''-''' || ''' | + | | align="left" | [[Image:Melee power icon.jpg|Melee Power]] Melee Power || '''-''' || '''-''' || '''12''' || '''-''' || '''12''' |
|- style="background:black; color:white;" | |- style="background:black; color:white;" | ||
| colspan="7" | '''Set Bonuses''' | | colspan="7" | '''Set Bonuses''' | ||
| Line 1,192: | Line 1,183: | ||
---- | ---- | ||
| − | ====Ruin==== | + | ====<u>Ruin</u>==== |
[[image:Ruin.jpg | thumb | Ruin Armor Set]] | [[image:Ruin.jpg | thumb | Ruin Armor Set]] | ||
| Line 1,203: | Line 1,194: | ||
! Greenskin | ! Greenskin | ||
|- | |- | ||
| − | |The Storm is Coming | + | |The Storm is Coming || '''-''' || '''-''' |
|- | |- | ||
| − | |Fall of Grimclan | + | |Fall of Grimclan || '''-''' || '''-''' |
|- | |- | ||
| − | |Eastern Breach | + | |Eastern Breach || '''-''' || '''-''' |
|- | |- | ||
| − | |Wings of the Griffin | + | |Wings of the Griffin || '''-''' || '''-''' |
|- | |- | ||
| − | |Dark Retribution | + | |Dark Retribution || '''-''' || '''-''' |
|- | |- | ||
| − | |Vulgar Display of Power | + | |Vulgar Display of Power || '''-''' || '''-''' |
|- | |- | ||
| − | |All the Kings Men | + | |All the Kings Men || '''-''' || '''-''' |
|} | |} | ||
| − | + | {| class="mw-collapsible mw-collapsed wikitable" style="background:#cccccc; border:solid grey 1px; text-align:center;" | |
| − | {| | + | ! '''Accursed Defender Kit of Ruin''' |
| − | |||
|- | |- | ||
| − | |style="color: | + | | |
| − | | | + | {| border="1" cellpadding="5" cellspacing="0" style="font-size:90%; text-align:center; margin:3px;" |
| − | + | !style="background:black; color:white;" | [[Image:Chosen Icon.jpg|Chosen]] | |
| − | + | !style="background:black; color:white;" | [[Image:Temp Chest.jpg|36px|Ruin Carapace]] | |
| − | + | !style="background:black; color:white;" | [[Image:Temp Shoulders.jpg|36px|Ruin Shoulderguards]] | |
| − | + | !style="background:black; color:white;" | [[Image:CC Armor Gloves 003.jpg|36px|Ruin Gauntlets]] | |
| − | ---- | + | !style="background:black; color:white;" | [[Image:CC Armor Boots 002.jpg|36px|Ruin Darkboots]] |
| + | !style="background:black; color:white;" | [[Image:Temp Helm.jpg|36px|Ruin Skullcase]] | ||
| + | !style="background:black; color:white;" | | ||
| + | !style="background:black; color:white;" | '''Total''' | ||
| + | |- style="background:black; color:white;" | ||
| + | | align="left" | [[Image:Armor icon.jpg|Armor]] Armor || '''646''' || '''581''' || '''505''' || '''481''' || '''568''' || rowspan="10" | || '''2781''' | ||
| + | |- style="background:black; color:white;" | ||
| + | | align="left" | [[Image:Strength icon.jpg|Strength]] Strength || '''15''' || '''13''' || '''8''' || '''11''' || '''-''' || '''47''' | ||
| + | |- style="background:black; color:white;" | ||
| + | | align="left" | [[Image:Willpower icon.jpg|Willpower]] Willpower || '''-''' || '''-''' || '''-''' || '''9''' || '''-''' || '''9''' | ||
| + | |- style="background:black; color:white;" | ||
| + | | align="left" | [[Image:Toughness icon.jpg|Toughness]] Toughness || '''29''' || '''26''' || '''23''' || '''12''' || '''28''' || '''118''' | ||
| + | |- style="background:black; color:white;" | ||
| + | | align="left" | [[Image:Wounds icon.jpg|Wounds]] Wounds || '''14''' || '''-''' || '''-''' || '''23''' || '''12''' || '''49''' | ||
| + | |- style="background:black; color:white;" | ||
| + | | align="left" | [[Image:Initiative icon.jpg|Initiative]] Initiative || '''-''' || '''11''' || '''-''' || '''-''' || '''11''' || '''22''' | ||
| + | |- style="background:black; color:white;" | ||
| + | | align="left" | [[Image:Weapon skill icon.jpg|Weapon Skill]] Weapon Skill || '''-''' || '''-''' || '''12''' || '''-''' || '''14''' || '''26''' | ||
| + | |- style="background:black; color:white;" | ||
| + | | align="left" | [[Image:Bulletpoint icon.jpg|Morale Per Second]] Morale Per Second || '''3''' || '''-''' || '''-''' || '''-''' || '''-''' || '''3''' | ||
| + | |- style="background:black; color:white;" | ||
| + | | align="left" | [[Image:Block_icon.jpg|Block]] Block || '''-''' || '''2%''' || '''-''' || '''-''' || '''-''' || '''2%''' | ||
| + | |- style="background:black; color:white;" | ||
| + | | align="left" | [[Image:Parry_icon.jpg|Parry]] Parry || '''-''' || '''-''' || '''2%''' || '''-''' || '''-''' || '''2%''' | ||
| + | |- style="background:black; color:white;" | ||
| + | | colspan="8" | '''Set Bonuses''' | ||
| + | |- style="background:black; color:white;" | ||
| + | | colspan="2" | '''(2 Piece Bonus)''' | ||
| + | | colspan="6" | '''+ 630 Armor Bonus''' | ||
| + | |- style="background:black; color:white;" | ||
| + | | colspan="2" | '''(3 Piece Bonus)''' | ||
| + | | colspan="6" | '''+ 55 Toughness''' | ||
| + | |- style="background:black; color:white;" | ||
| + | | colspan="2" | '''(4 Piece Bonus)''' | ||
| + | | colspan="6" | '''+ 5% Block''' | ||
| + | |- style="background:black; color:white;" | ||
| + | | colspan="2" | '''(5 Piece Bonus)''' | ||
| + | | colspan="6" | '''+ 2 Path of Dread Abilitys''' | ||
| + | |} | ||
| + | |} | ||
| − | ===RVR Sets=== | + | |
| − | These sets can be bought from venders in IC using RVR currency. | + | <!--Back to top button--> |
| − | + | {| align=right style="border: 0px groove red; padding: 0px; margin: 0px" | |
| − | Completing these sets gives the title "The Decioblidevannihilator" | + | |style="color: brown"|<span class="plainlinks">[http://wiki.theamazonbasin.com/index.php/Chosen Back To Top]</span> |
| − | + | |- | |
| − | ====Decimator==== | + | |style="color: brown"|<span class="plainlinks">[http://wiki.theamazonbasin.com/index.php/Chosen#Guides Back to Guides]</span> |
| + | |} <br /> | ||
| + | |||
| + | |||
| + | |||
| + | |||
| + | ---- | ||
| + | |||
| + | ===RVR Sets=== | ||
| + | These sets can be bought from venders in IC using RVR currency. | ||
| + | |||
| + | Completing these sets gives the title "The Decioblidevannihilator" | ||
| + | |||
| + | ====<u>Decimator</u>==== | ||
[[image:Decimator.jpg | thumb | Decimator Armor Set]] | [[image:Decimator.jpg | thumb | Decimator Armor Set]] | ||
| Line 1,252: | Line 1,294: | ||
| − | + | {| class="mw-collapsible mw-collapsed wikitable" style="background:#cccccc; border:solid grey 1px; text-align:center;" | |
| − | + | ! '''Decimator Accursed Defender kit''' | |
| − | |||
| − | {| | ||
| − | |||
|- | |- | ||
| − | |style="color: brown"|<span class="plainlinks">[http://wiki.theamazonbasin.com/index.php/Chosen#Guides Back to Guides]</span> | + | | |
| − | |} <br /> | + | {| border="1" cellpadding="5" cellspacing="0" style="font-size:90%; text-align:center; margin:3px;" |
| − | + | !style="background:black; color:white;" | [[Image:Chosen Icon.jpg|Chosen]] | |
| − | + | !style="background:black; color:white;" | [[Image:Temp Chest.jpg|36px|Decimator Carapace]] | |
| − | + | !style="background:black; color:white;" | [[Image:CC Armor Boots 002.jpg|36px|Decimator Darkboots]] | |
| + | !style="background:black; color:white;" | | ||
| + | !style="background:black; color:white;" | '''Total''' | ||
| + | |- style="background:black; color:white;" | ||
| + | | align="left" | [[Image:Armor icon.jpg|Armor]] Armor || '''165''' || '''120''' || rowspan="7" | || '''285''' | ||
| + | |- style="background:black; color:white;" | ||
| + | | align="left" | [[Image:Strength icon.jpg|Strength]] Strength || '''5''' || '''2''' || '''7''' | ||
| + | |- style="background:black; color:white;" | ||
| + | | align="left" | [[Image:Toughness icon.jpg|Toughness]] Toughness || '''8''' || '''4''' || '''12''' | ||
| + | |- style="background:black; color:white;" | ||
| + | | align="left" | [[Image:Wounds icon.jpg|Wounds]] Wounds || '''-''' || '''6''' || '''6''' | ||
| + | |- style="background:black; color:white;" | ||
| + | | align="left" | [[Image:Initiative icon.jpg|Initiative]] Initiative || '''4''' || '''-''' || '''4''' | ||
| + | |- style="background:black; color:white;" | ||
| + | | align="left" | [[Image:Weapon skill icon.jpg|Weapon Skill]] Weapon Skill || '''-''' || '''2''' || '''2''' | ||
| + | |- style="background:black; color:white;" | ||
| + | | align="left" | [[Image:Block_icon.jpg|Block]] Block || '''1%''' || '''-''' || '''1%''' | ||
| + | |- style="background:black; color:white;" | ||
| + | | colspan="5" | '''Set Bonuses''' | ||
| + | |- style="background:black; color:white;" | ||
| + | | colspan="2" | '''(2 Piece Bonus)''' | ||
| + | | colspan="3" | '''+ 14 Strength''' | ||
| + | |} | ||
| + | |} | ||
| + | |||
| + | |||
| + | |||
| + | |||
| + | <!--Back to top button--> | ||
| + | {| align=right style="border: 0px groove red; padding: 0px; margin: 0px" | ||
| + | |style="color: brown"|<span class="plainlinks">[http://wiki.theamazonbasin.com/index.php/Chosen Back To Top]</span> | ||
| + | |- | ||
| + | |style="color: brown"|<span class="plainlinks">[http://wiki.theamazonbasin.com/index.php/Chosen#Guides Back to Guides]</span> | ||
| + | |} <br /> | ||
| + | |||
| + | |||
| + | |||
---- | ---- | ||
| − | ====Obliterator==== | + | ====<u>Obliterator</u>==== |
[[image:Obliterator.jpg | thumb | Obliterator Armor Set]] | [[image:Obliterator.jpg | thumb | Obliterator Armor Set]] | ||
| Line 1,284: | Line 1,359: | ||
| − | + | {| class="mw-collapsible mw-collapsed wikitable" style="background:#cccccc; border:solid grey 1px; text-align:center;" | |
| − | + | ! '''Obliterator Accursed Defender kit''' | |
| − | {| | ||
| − | |||
|- | |- | ||
| − | |style="color: | + | | |
| − | |} | + | {| border="1" cellpadding="5" cellspacing="0" style="font-size:90%; text-align:center; margin:3px;" |
| + | !style="background:black; color:white;" | [[Image:Chosen Icon.jpg|Chosen]] | ||
| + | !style="background:black; color:white;" | [[Image:Temp Chest.jpg|36px|Carapace]] | ||
| + | !style="background:black; color:white;" | [[Image:CC Armor Gloves 003.jpg|36px|Gauntlets]] | ||
| + | !style="background:black; color:white;" | [[Image:CC Armor Boots 002.jpg|36px|Darkboots]] | ||
| + | !style="background:black; color:white;" | | ||
| + | !style="background:black; color:white;" | '''Total''' | ||
| + | |- style="background:black; color:white;" | ||
| + | | align="left" | [[Image:Armor icon.jpg|Armor]] Armor || '''330''' || '''252''' || '''240''' || rowspan="8" | || '''822''' | ||
| + | |- style="background:black; color:white;" | ||
| + | | align="left" | [[Image:Strength icon.jpg|Strength]] Strength || '''9''' || '''7''' || '''4''' || '''20''' | ||
| + | |- style="background:black; color:white;" | ||
| + | | align="left" | [[Image:Toughness icon.jpg|Toughness]] Toughness || '''15''' || '''12''' || '''7''' || '''34''' | ||
| + | |- style="background:black; color:white;" | ||
| + | | align="left" | [[Image:Wounds icon.jpg|Wounds]] Wounds || '''-''' || '''6''' || '''5''' || '''11''' | ||
| + | |- style="background:black; color:white;" | ||
| + | | align="left" | [[Image:Initiative icon.jpg|Initiative]] Initiative || '''6''' || '''-''' || '''-''' || '''6''' | ||
| + | |- style="background:black; color:white;" | ||
| + | | align="left" | [[Image:Weapon skill icon.jpg|Weapon Skill]] Weapon Skill || '''-''' || '''-''' || '''12''' || '''12''' | ||
| + | |- style="background:black; color:white;" | ||
| + | | align="left" | [[Image:Melee power icon.jpg|Melee Power]] Melee Power || '''-''' || '''7''' || '''-''' || '''7''' | ||
| + | |- style="background:black; color:white;" | ||
| + | | align="left" | [[Image:Block_icon.jpg|Block]] Block || '''2%''' || '''-''' || '''-''' || '''2%''' | ||
| + | |- style="background:black; color:white;" | ||
| + | | colspan="6" | '''Set Bonuses''' | ||
| + | |- style="background:black; color:white;" | ||
| + | | colspan="2" | '''(2 Piece Bonus)''' | ||
| + | | colspan="4" | '''+ 27 Strengh''' | ||
| + | |- style="background:black; color:white;" | ||
| + | | colspan="2" | '''(3 Piece Bonus)''' | ||
| + | | colspan="4" | '''Add 2 levels to Ravage''' | ||
| + | |} | ||
| + | |} | ||
| − | ---- | + | <!--Back to top button--> |
| + | {| align=right style="border: 0px groove red; padding: 0px; margin: 0px" | ||
| + | |style="color: brown"|<span class="plainlinks">[http://wiki.theamazonbasin.com/index.php/Chosen Back To Top]</span> | ||
| + | |- | ||
| + | |style="color: brown"|<span class="plainlinks">[http://wiki.theamazonbasin.com/index.php/Chosen#Guides Back to Guides]</span> | ||
| + | |} <br /> | ||
| + | |||
| + | |||
| + | |||
| − | ====Devastator==== | + | ---- |
| + | |||
| + | ====<u>Devastator</u>==== | ||
[[image:Devastator.jpg | thumb | Devastator Armor Set]] | [[image:Devastator.jpg | thumb | Devastator Armor Set]] | ||
| Line 1,319: | Line 1,434: | ||
| − | + | {| class="mw-collapsible mw-collapsed wikitable" style="background:#cccccc; border:solid grey 1px; text-align:center;" | |
| − | {| | + | ! '''Devastator Accursed Defender kit''' |
| − | |||
|- | |- | ||
| − | | | + | | |
| − | |||
| − | |||
| − | |||
| − | |||
| − | |||
| − | |||
| − | |||
| − | |||
| − | |||
| − | |||
| − | |||
| − | |||
| − | |||
| − | |||
| − | |||
{| border="1" cellpadding="5" cellspacing="0" style="font-size:90%; text-align:center; margin:3px;" | {| border="1" cellpadding="5" cellspacing="0" style="font-size:90%; text-align:center; margin:3px;" | ||
| − | ! | + | !style="background:black; color:white;" | [[Image:Chosen Icon.jpg|Chosen]] |
| − | ! | + | !style="background:black; color:white;" | [[Image:Temp Chest.jpg|36px|Carapace]] |
| − | ! | + | !style="background:black; color:white;" | [[Image:Temp Shoulders.jpg|36px|Shoulderguards]] |
| − | |- | + | !style="background:black; color:white;" | [[Image:CC Armor Gloves 003.jpg|36px|Gauntlets]] |
| − | |''' | + | !style="background:black; color:white;" | [[Image:CC Armor Boots 002.jpg|36px|Darkboots]] |
| − | |- | + | !style="background:black; color:white;" | [[Image:Temp Helm.jpg|36px|Skullcase]] |
| − | |''' | + | !style="background:black; color:white;" | |
| − | |- | + | !style="background:black; color:white;" | '''Total''' |
| − | |''' | + | |- style="background:black; color:white;" |
| − | |- | + | | align="left" | [[Image:Armor icon.jpg|Armor]] Armor || '''571''' || '''514''' || '''421''' || '''396''' || '''487''' || rowspan="10" | || '''2389''' |
| − | |''' | + | |- style="background:black; color:white;" |
| − | |- | + | | align="left" | [[Image:Strength icon.jpg|Strength]] Strength || '''16''' || '''9''' || '''7''' || '''-''' || '''10''' || '''42''' |
| − | |''' | + | |- style="background:black; color:white;" |
| − | |} | + | | align="left" | [[Image:Willpower icon.jpg|Willpower]] Willpower || '''-''' || '''-''' || '''-''' || '''7''' || '''-''' || '''7''' |
| − | + | |- style="background:black; color:white;" | |
| − | + | | align="left" | [[Image:Toughness icon.jpg|Toughness]] Toughness || '''26''' || '''23''' || '''19''' || '''11''' || '''25''' || '''104''' | |
| + | |- style="background:black; color:white;" | ||
| + | | align="left" | [[Image:Wounds icon.jpg|Wounds]] Wounds || '''9''' || '''-''' || '''-''' || '''20''' || '''13''' || '''42''' | ||
| + | |- style="background:black; color:white;" | ||
| + | | align="left" | [[Image:Initiative icon.jpg|Initiative]] Initiative || '''-''' || '''-''' || '''-''' || '''-''' || '''9''' || '''9''' | ||
| + | |- style="background:black; color:white;" | ||
| + | | align="left" | [[Image:Weapon skill icon.jpg|Weapon Skill]] Weapon Skill || '''-''' || '''15''' || '''12''' || '''8''' || '''-''' || '''35''' | ||
| + | |- style="background:black; color:white;" | ||
| + | | align="left" | [[Image:Bulletpoint icon.jpg|Hit Points Every 4 Seconds]] Hit Points Every 4 Seconds || '''40''' || '''-''' || '''-''' || '''-''' || '''-''' || '''40''' | ||
| + | |- style="background:black; color:white;" | ||
| + | | align="left" | [[Image:Melee crit icon.jpg|Melee Critical Chance]] Melee Critical Chance || '''-''' || '''-''' || '''2%''' || '''-''' || '''-''' || '''2%''' | ||
| + | |- style="background:black; color:white;" | ||
| + | | align="left" | [[Image:Block_icon.jpg|Block]] Block || '''-''' || '''1%''' || '''-''' || '''-''' || '''-''' || '''1%''' | ||
| + | |- style="background:black; color:white;" | ||
| + | | colspan="8" | '''Set Bonuses''' | ||
| + | |- style="background:black; color:white;" | ||
| + | | colspan="2" | '''(2 Piece Bonus)''' | ||
| + | | colspan="6" | '''+ 47 Strenght''' | ||
| + | |- style="background:black; color:white;" | ||
| + | | colspan="2" | '''(3 Piece Bonus)''' | ||
| + | | colspan="6" | '''+ 240 Elemental Resistance''' | ||
| + | |- style="background:black; color:white;" | ||
| + | | colspan="2" | '''(4 Piece Bonus)''' | ||
| + | | colspan="6" | '''+ 47 Wounds''' | ||
| + | |- style="background:black; color:white;" | ||
| + | | colspan="2" | '''(5 Piece Bonus)''' | ||
| + | | colspan="6" | '''Aggravation:<br /> On Hit:<br /> 10% Chance to Taunt Target.''' | ||
| + | |} | ||
| + | |} | ||
| + | |||
| + | |||
| + | |||
<!--Back to top button--> | <!--Back to top button--> | ||
{| align=right style="border: 0px groove red; padding: 0px; margin: 0px" | {| align=right style="border: 0px groove red; padding: 0px; margin: 0px" | ||
| Line 1,368: | Line 1,498: | ||
---- | ---- | ||
| − | === | + | ====<u>Annihilator</u>==== |
| − | + | ||
| + | [[image:Annihilator.jpg | thumb | Annihilator Armor Set]] | ||
| − | + | As of patch 1.4.0 Annihilator no longer costs officers medallions | |
| − | |||
| − | + | This armor is bought using standard currency | |
| − | |||
| − | |||
{| border="1" cellpadding="5" cellspacing="0" style="font-size:90%; text-align:center; margin:3px;" | {| border="1" cellpadding="5" cellspacing="0" style="font-size:90%; text-align:center; margin:3px;" | ||
! | ! | ||
| − | ! | + | !Silver |
| − | ! | + | !Copper |
|- | |- | ||
| − | |'' | + | |'''Gauntlets:''' || '''66''' || '''77''' |
|- | |- | ||
| − | |'' | + | |'''Darkboots:''' || '''65''' || '''77''' |
|- | |- | ||
| − | |'' | + | |'''Shoulderguards:''' || '''45''' || '''-''' |
|- | |- | ||
| − | |'' | + | |'''Skullcase:''' || '''75''' || '''57''' |
|- | |- | ||
| − | |'' | + | |'''Carapace:''' || '''83''' || '''97''' |
| − | |||
| − | |||
|} | |} | ||
| − | + | ||
| − | {| | + | {| class="mw-collapsible mw-collapsed wikitable" style="background:#cccccc; border:solid grey 1px; text-align:center;" |
| − | + | ! '''Annihilator Accursed Defender Kit''' | |
|- | |- | ||
| − | | | + | | |
| − | |||
| − | |||
| − | |||
| − | |||
| − | |||
| − | |||
| − | |||
| − | |||
| − | |||
| − | |||
| − | |||
| − | |||
{| border="1" cellpadding="5" cellspacing="0" style="font-size:90%; text-align:center; margin:3px;" | {| border="1" cellpadding="5" cellspacing="0" style="font-size:90%; text-align:center; margin:3px;" | ||
| − | ! | + | !style="background:black; color:white;" | [[Image:Chosen Icon.jpg|Chosen]] |
| − | ! | + | !style="background:black; color:white;" | [[Image:Temp Chest.jpg|36px|Carapace]] |
| − | + | !style="background:black; color:white;" | [[Image:Temp Shoulders.jpg|36px|Shoulderguards]] | |
| − | |- | + | !style="background:black; color:white;" | [[Image:CC Armor Gloves 003.jpg|36px|Gauntlets]] |
| − | |'' | + | !style="background:black; color:white;" | [[Image:CC Armor Boots 002.jpg|36px|Darkboots]] |
| − | |- | + | !style="background:black; color:white;" | [[Image:Temp Helm.jpg|36px|Skullcase]] |
| − | |'' | + | !style="background:black; color:white;" | |
| − | |- | + | !style="background:black; color:white;" | '''Total''' |
| − | |'' | + | |- style="background:black; color:white;" |
| − | |- | + | | align="left" | [[Image:Armor icon.jpg|Armor]] Armor || '''721''' || '''636''' || '''565''' || '''565''' || '''649''' || rowspan="11" | || '''3136''' |
| − | |'' | + | |- style="background:black; color:white;" |
| − | |- | + | | align="left" | [[Image:Strength icon.jpg|Strength]] Strength || '''-''' || '''12''' || '''29''' || '''-''' || '''13''' || '''54''' |
| − | |'' | + | |- style="background:black; color:white;" |
| − | |- | + | | align="left" | [[Image:Willpower icon.jpg|Willpower]] Willpower || '''-''' || '''-''' || '''-''' || '''10''' || '''-''' || '''10''' |
| − | |'' | + | |- style="background:black; color:white;" |
| + | | align="left" | [[Image:Toughness icon.jpg|Toughness]] Toughness || '''32''' || '''28''' || '''11''' || '''25''' || '''29''' || '''125''' | ||
| + | |- style="background:black; color:white;" | ||
| + | | align="left" | [[Image:Wounds icon.jpg|Wounds]] Wounds || '''17''' || '''18''' || '''16''' || '''-''' || '''-''' || '''51''' | ||
| + | |- style="background:black; color:white;" | ||
| + | | align="left" | [[Image:Initiative icon.jpg|Initiative]] Initiative || '''12''' || '''-''' || '''-''' || '''-''' || '''-''' || '''12''' | ||
| + | |- style="background:black; color:white;" | ||
| + | | align="left" | [[Image:Weapon skill icon.jpg|Weapon Skill]] Weapon Skill || '''-''' || '''-''' || '''9''' || '''13''' || '''16''' || '''38''' | ||
| + | |- style="background:black; color:white;" | ||
| + | | align="left" | [[Image:Bulletpoint icon.jpg|AP Per Second]] AP Per Second || '''3''' || '''-''' || '''-''' || '''-''' || '''-''' || '''3''' | ||
| + | |- style="background:black; color:white;" | ||
| + | | align="left" | [[Image:Bulletpoint icon.jpg|Reduction In Being Critically Hit]] Reduction In Being Critically Hit || '''-''' || '''3%''' || '''-''' || '''-''' || '''-''' || '''3%''' | ||
| + | |- style="background:black; color:white;" | ||
| + | | align="left" | [[Image:Dodge icon.jpg|Dodge]] Dodge || '''-''' || '''-''' || '''-''' || '''2%''' || '''-''' || '''2%''' | ||
| + | |- style="background:black; color:white;" | ||
| + | | align="left" | [[Image:Disrupt_icon.jpg|Disrupt]] Disrupt || '''-''' || '''-''' || '''-''' || '''-''' || '''2%''' || '''2%''' | ||
| + | |- style="background:black; color:white;" | ||
| + | | colspan="8" | '''Set Bonuses''' | ||
| + | |- style="background:black; color:white;" | ||
| + | | colspan="2" | '''(2 Piece Bonus)''' | ||
| + | | colspan="6" | '''+ 62 Strength''' | ||
| + | |- style="background:black; color:white;" | ||
| + | | colspan="2" | '''(3 Piece Bonus)''' | ||
| + | | colspan="6" | '''+ 320 Elemental Resistance''' | ||
| + | |- style="background:black; color:white;" | ||
| + | | colspan="2" | '''(4 Piece Bonus)''' | ||
| + | | colspan="6" | '''5% Disrupt''' | ||
| + | |- style="background:black; color:white;" | ||
| + | | colspan="2" | '''(5 Piece Bonus)''' | ||
| + | | colspan="6" | '''+ 2 Path of Corruption Abilities''' | ||
| + | |} | ||
|} | |} | ||
| + | |||
| + | |||
<!--Back to top button--> | <!--Back to top button--> | ||
| Line 1,443: | Line 1,589: | ||
---- | ---- | ||
| − | ==== | + | ===City Instance Sets=== |
| + | These sets can be bought from venders in IC using RVR currency or from gold bags in the City | ||
| + | |||
| + | Completing these sets gives the title "Urbanite" | ||
| + | ====<u>Conqueror’s</u>==== | ||
| − | [[image: | + | [[image:Conqueror's.jpg | thumb | Conqueror's Armor Set]] |
| − | This armor can be bought from Overlord Steelhide in The Undercroft. | + | This armor can be bought from Overlord Steelhide in The Undercroft Or from Contested City / Skaven dungeon Stage 2 gold bags.<br /> |
| + | ''Note:'' As of patch 1.4.0 Conqueror's gear no longer need "Conqueror's Crests" to buy | ||
{| border="1" cellpadding="5" cellspacing="0" style="font-size:90%; text-align:center; margin:3px;" | {| border="1" cellpadding="5" cellspacing="0" style="font-size:90%; text-align:center; margin:3px;" | ||
! | ! | ||
!Officer's Medallions | !Officer's Medallions | ||
| − | ! | + | !Conqueror's Crests |
|- | |- | ||
| − | |'' | + | |''Conqueror's Deathgirdle:'' || '''70''' || '''-''' |
|- | |- | ||
| − | |'' | + | |''Conqueror's Gauntlets:'' || '''115''' || '''-''' |
|- | |- | ||
| − | |'' | + | |''Conqueror's Darkboots:'' || '''160''' || '''-''' |
|- | |- | ||
| − | |'' | + | |''Conqueror's Shoulderguards:'' || '''200''' || '''-''' |
|- | |- | ||
| − | |'' | + | |''Conqueror's Skullcase:'' || '''245''' || '''-''' |
|- | |- | ||
| − | |'' | + | |''Conqueror's Carapace:'' || '''290''' || '''-''' |
| − | |||
| − | |||
|} | |} | ||
| Line 1,480: | Line 1,629: | ||
---- | ---- | ||
| − | ==== | + | ====<u>Invader’s</u>==== |
| − | [[image: | + | [[image:Invader's.jpg | thumb | Invader's Armor Set]] |
| − | |||
| − | This armor can be bought from Overlord Steelhide in The Undercroft | + | This armor can be bought from Overlord Steelhide in The Undercroft. |
{| border="1" cellpadding="5" cellspacing="0" style="font-size:90%; text-align:center; margin:3px;" | {| border="1" cellpadding="5" cellspacing="0" style="font-size:90%; text-align:center; margin:3px;" | ||
! | ! | ||
!Officer's Medallions | !Officer's Medallions | ||
| − | ! | + | !Invader's Crests |
|- | |- | ||
| − | |'' | + | |''Invader's Belt:'' || '''105''' || '''15''' |
|- | |- | ||
| − | |'' | + | |''Invader's Gauntlets:'' || '''155''' || '''30''' |
|- | |- | ||
| − | |'' | + | |''Invader's Darkboots:'' || '''190''' || '''45''' |
|- | |- | ||
| − | |'' | + | |''Invader's Shoulderguards:'' || '''225''' || '''60''' |
|- | |- | ||
| − | |'' | + | |''Invader's Skullcase:'' || '''260''' || '''75''' |
|- | |- | ||
| − | |'' | + | |''Invader's Carapace:'' || '''295''' || '''85''' |
| − | |||
| − | |||
| − | |||
| − | |||
|} | |} | ||
| − | |||
<!--Back to top button--> | <!--Back to top button--> | ||
| Line 1,521: | Line 1,664: | ||
---- | ---- | ||
| − | === | + | ====<u>Warlord’s</u>==== |
| − | |||
| − | + | [[image:Warlord's.jpg | thumb | Warlords Armor Set]] | |
| − | + | This armor can be bought from Overlord Steelhide in The Undercroft. | |
| − | + | {| border="1" cellpadding="5" cellspacing="0" style="font-size:90%; text-align:center; margin:3px;" | |
| − | ''' | + | ! |
| − | + | !Officer's Medallions | |
| − | + | !Warlord's Crests | |
| − | + | |- | |
| − | ''' | + | |''Warlord's Chaos Seal:'' || '''130''' || '''4''' |
| − | + | |- | |
| − | + | |''Warlord's Deathgirdle:'' || '''185''' || '''15''' | |
| − | + | |- | |
| − | ''' | + | |''Warlord's Gauntlets:'' || '''240''' || '''30''' |
| − | + | |- | |
| − | + | |''Warlord's Darkboots:'' || '''295''' || '''45''' | |
| − | + | |- | |
| − | ''' | + | |''Warlord's Shoulderguards:'' || '''350''' || '''60''' |
| − | + | |- | |
| − | + | |''Warlord's Skullcase:'' || '''400''' || '''75''' | |
| − | + | |- | |
| − | ''' | + | |''Warlord's Carapace:'' || '''455''' || '''85''' |
| − | + | |} | |
| − | |||
| − | |||
| − | ''' | ||
| − | |||
| − | |||
<!--Back to top button--> | <!--Back to top button--> | ||
| Line 1,564: | Line 1,701: | ||
---- | ---- | ||
| − | ==== | + | ====<u>Sovergen</u>==== |
| − | |||
| − | This armor can be bought from Overlord Steelhide in The Undercroft Or from Contested City | + | [[image:Sovergen.jpg | thumb | Sovergen Armor Set]] |
| − | {| border="1" cellpadding="5" cellspacing="0" style="font-size:90%; text-align:center; margin:3px;" | + | [[image:Sovergen_Back.jpg | thumb | Sovergen Armor Back]] |
| + | |||
| + | This armor can be bought from Overlord Steelhide in The Undercroft Or from Contested City Stage 1 gold loot bags. | ||
| + | {| border="1" cellpadding="5" cellspacing="0" style="font-size:90%; text-align:center; margin:3px;" | ||
! | ! | ||
| − | ! | + | !Officer's Medallions |
| − | ! | + | !Royal Crests |
| + | |- | ||
| + | |''Sovergen Changegem:'' || '''135''' || '''4''' | ||
| + | |- | ||
| + | |''Sovergen Belt:'' || '''190''' || '''20''' | ||
| + | |- | ||
| + | |''Sovergen Gauntlets:'' || '''245''' || '''45''' | ||
|- | |- | ||
| − | |'' | + | |''Sovergen Darkboots:'' || '''300''' || '''70''' |
|- | |- | ||
| − | |'' | + | |''Sovergen Shoulderguards:'' || '''325''' || '''90''' |
|- | |- | ||
| − | |'' | + | |''Sovergen Skullcase:'' || '''350''' || '''115''' |
|- | |- | ||
| − | |'' | + | |''Sovergen Cloak:'' || '''405''' || '''140''' |
|- | |- | ||
| − | |'' | + | |''Sovergen Carapace:'' || '''495''' || '''165''' |
|} | |} | ||
| + | <!--Back to top button--> | ||
| + | {| align=right style="border: 0px groove red; padding: 0px; margin: 0px" | ||
| + | |style="color: brown"|<span class="plainlinks">[http://wiki.theamazonbasin.com/index.php/Chosen Back To Top]</span> | ||
| + | |- | ||
| + | |style="color: brown"|<span class="plainlinks">[http://wiki.theamazonbasin.com/index.php/Chosen#Guides Back to Guides]</span> | ||
| + | |} <br /> | ||
| − | + | ||
| − | + | ||
| − | + | ||
| − | + | ---- | |
| − | + | ||
| − | + | ===Misc sets=== | |
| − | + | These sets were added through patches or game expansions | |
| − | + | ||
| − | + | ====<u>Tyrant</u>==== | |
| − | + | ||
| − | + | dropped from bosses in Tomb of the Vulture Lord | |
| − | + | ||
| − | + | '''Boots''' | |
| − | + | ||
| − | + | drops off Usirian's keeper | |
| − | + | ||
| − | + | '''Shoulders''' | |
| − | | align= | + | |
| − | + | High Priest Herakh (2nd) | |
| − | | | + | |
| − | + | '''Helm''' | |
| − | | | + | |
| − | | | + | drops of Boss 6 (akil, tumaini, Jahi) |
| − | | | + | |
| − | + | '''Chest''' | |
| − | + | ||
| − | | | + | drops off Vulture Lord |
| − | + | ||
| − | + | '''Gloves''' | |
| − | + | ||
| − | + | bought from vender for 200 golden scarabs and 3 funerary masks | |
| − | + | ||
| − | |- | + | '''Belt''' |
| − | + | ||
| − | |- | + | bought from vender for 200 golden scarabs and 3 funerary masks |
| − | + | ||
| − | | | + | <!--Back to top button--> |
| − | | | + | {| align=right style="border: 0px groove red; padding: 0px; margin: 0px" |
| − | + | |style="color: brown"|<span class="plainlinks">[http://wiki.theamazonbasin.com/index.php/Chosen Back To Top]</span> | |
| − | + | |- | |
| − | + | |style="color: brown"|<span class="plainlinks">[http://wiki.theamazonbasin.com/index.php/Chosen#Guides Back to Guides]</span> | |
| − | + | |} <br /> | |
| − | + | ||
| − | | | + | |
| − | + | ||
| − | | | + | |
| − | {| border="1" cellpadding="5" cellspacing="0" style="font-size:90%; text-align:center; margin:3px;" | + | ---- |
| + | |||
| + | ====<u>Doomflayer</u>==== | ||
| + | [[image:Doomflayer.jpg|thumb|Doomflayer armor]] | ||
| + | |||
| + | This armor can be bought from Overlord Steelhide in The Undercroft Or from Contested City / Skaven dungeon Stage 2 gold bags. | ||
| + | {| border="1" cellpadding="5" cellspacing="0" style="font-size:90%; text-align:center; margin:3px;" | ||
| + | ! | ||
| + | !Captain's Medallions | ||
| + | !Doomflayer Crests | ||
| + | |- | ||
| + | |''Doomflayer Gauntlets:'' || 495 || 70 | ||
| + | |- | ||
| + | |''Doomflayer Darkboots:'' || 565 || 90 | ||
| + | |- | ||
| + | |''Doomflayer Shoulderguards:'' || 600 || 175 | ||
| + | |- | ||
| + | |''Doomflayer Skullcase:'' || 635 || 260 | ||
| + | |- | ||
| + | |''Doomflayer Carapace:'' || 820 || 47 | ||
| + | |} | ||
| + | |||
| + | |||
| + | |||
| + | {| class="mw-collapsible mw-collapsed wikitable" style="background:#cccccc; border:solid grey 1px; text-align:center;" | ||
| + | ! '''Doomflayer's Accursed Defender Kit (Defensive)''' | ||
| + | ! '''Doomflayer's Accursed Defender Kit (Offensive)''' | ||
| + | |- | ||
| + | | | ||
| + | {| border="1" cellpadding="5" cellspacing="0" style="font-size:90%; text-align:center; margin:3px;" | ||
!style="background:black; color:white;" | [[Image:Chosen Icon.jpg|Chosen]] | !style="background:black; color:white;" | [[Image:Chosen Icon.jpg|Chosen]] | ||
| − | !style="background:black; color:white;" | [[Image:Temp Chest.jpg|36px|Carapace]] | + | !style="background:black; color:white;" | [[Image:Temp Chest.jpg|36px|Doomflayer Carapace]] |
| − | !style="background:black; color:white;" | [[Image:Temp Shoulders.jpg|36px|Shoulderguards]] | + | !style="background:black; color:white;" | [[Image:Temp Shoulders.jpg|36px|Doomflayer Shoulderguards]] |
| − | !style="background:black; color:white;" | [[Image:CC Armor Gloves 003.jpg|36px|Gauntlets]] | + | !style="background:black; color:white;" | [[Image:CC Armor Gloves 003.jpg|36px|Doomflayer Gauntlets]] |
| − | !style="background:black; color:white;" | [[Image:CC Armor Boots 002.jpg|36px|Darkboots]] | + | !style="background:black; color:white;" | [[Image:CC Armor Boots 002.jpg|36px|Doomflayer Darkboots]] |
| − | !style="background:black; color:white;" | [[Image:Temp Helm.jpg|36px|Skullcase]] | + | !style="background:black; color:white;" | [[Image:Temp Helm.jpg|36px|Doomflayer Skullcase]] |
!style="background:black; color:white;" | | !style="background:black; color:white;" | | ||
!style="background:black; color:white;" | '''Total''' | !style="background:black; color:white;" | '''Total''' | ||
| Line 1,644: | Line 1,824: | ||
| align="left" | [[Image:Armor icon.jpg|Armor]] Armor || '''1303''' || '''1173''' || '''1042''' || '''1042''' || '''1173''' || rowspan="11" | || '''5733''' | | align="left" | [[Image:Armor icon.jpg|Armor]] Armor || '''1303''' || '''1173''' || '''1042''' || '''1042''' || '''1173''' || rowspan="11" | || '''5733''' | ||
|- style="background:black; color:white;" | |- style="background:black; color:white;" | ||
| − | | align="left" | [[Image:Strength icon.jpg|Strength]] Strength || ''' | + | | align="left" | [[Image:Strength icon.jpg|Strength]] Strength || '''-''' || '''-''' || '''41''' || '''49''' || '''51''' || '''141''' |
|- style="background:black; color:white;" | |- style="background:black; color:white;" | ||
| − | | align="left" | [[Image:Toughness icon.jpg|Toughness]] Toughness || ''' | + | | align="left" | [[Image:Toughness icon.jpg|Toughness]] Toughness || '''53''' || '''60''' || '''58''' || '''58''' || '''60''' || '''289''' |
|- style="background:black; color:white;" | |- style="background:black; color:white;" | ||
| − | | align="left" | [[Image:Wounds icon.jpg|Wounds]] Wounds || ''' | + | | align="left" | [[Image:Wounds icon.jpg|Wounds]] Wounds || '''44''' || '''51''' || '''-''' || '''41''' || '''46''' || '''182''' |
|- style="background:black; color:white;" | |- style="background:black; color:white;" | ||
| − | | align="left" | [[Image:Initiative icon.jpg|Initiative]] Initiative || ''' | + | | align="left" | [[Image:Initiative icon.jpg|Initiative]] Initiative || '''75''' || '''46''' || '''49''' || '''-''' || '''-''' || '''170''' |
|- style="background:black; color:white;" | |- style="background:black; color:white;" | ||
| − | | align="left" | [[Image:Bulletpoint icon.jpg|AP Per Second]] AP Per Second || '''-''' || '''-''' || ''' | + | | align="left" | [[Image:Bulletpoint icon.jpg|AP Per Second]] AP Per Second || '''-''' || '''-''' || '''2''' || '''2''' || '''-''' || '''4''' |
|- style="background:black; color:white;" | |- style="background:black; color:white;" | ||
| − | | align="left" | [[Image: | + | | align="left" | [[Image:Bulletpoint icon.jpg|Hit Points Every 4 Seconds]] Hit Points Every 4 Seconds || '''80''' || '''-''' || '''-''' || '''-''' || '''-''' || '''80''' |
|- style="background:black; color:white;" | |- style="background:black; color:white;" | ||
| − | | align="left" | [[Image:Melee crit icon.jpg| | + | | align="left" | [[Image:Melee crit icon.jpg|Reduced Armor Penetration]] Reduced Armor Penetration || '''-''' || '''-''' || '''4%''' || '''-''' || '''-''' || '''4%''' |
|- style="background:black; color:white;" | |- style="background:black; color:white;" | ||
| − | | align="left" | [[Image: | + | | align="left" | [[Image:Bulletpoint icon.jpg|Reduction In Being Critically Hit]] Reduction In Being Critically Hit || '''-''' || '''3%''' || '''-''' || '''-''' || '''4%''' || '''7%''' |
|- style="background:black; color:white;" | |- style="background:black; color:white;" | ||
| − | | align="left" | [[Image: | + | | align="left" | [[Image:Bulletpoint icon.jpg|Fortitude]] Fortitude || '''40''' || '''40''' || '''-''' || '''-''' || '''-''' || '''80''' |
|- style="background:black; color:white;" | |- style="background:black; color:white;" | ||
| − | | align="left" | [[Image: | + | | align="left" | [[Image:Block_icon.jpg|Block]] Block || '''-''' || '''-''' || '''-''' || '''3%''' || '''2%''' || '''5%''' |
|- style="background:black; color:white;" | |- style="background:black; color:white;" | ||
| colspan="11" | '''Set Bonuses''' | | colspan="11" | '''Set Bonuses''' | ||
|- style="background:black; color:white;" | |- style="background:black; color:white;" | ||
| colspan="2" | '''(2 Piece Bonus)''' | | colspan="2" | '''(2 Piece Bonus)''' | ||
| − | | colspan=" | + | | colspan="6" | '''On being attacked: <br /> 10% chance to incress fortitude by <br /> 238 for 10 seconds''' |
|- style="background:black; color:white;" | |- style="background:black; color:white;" | ||
| colspan="2" | '''(4 Piece Bonus)''' | | colspan="2" | '''(4 Piece Bonus)''' | ||
| − | | colspan=" | + | | colspan="6" | '''On being attacked: <br /> 10% chance to reduce incoming damage<br /> to your group by 7% for 10 seconds''' |
|} | |} | ||
| − | | | + | | |
| − | |||
| − | |||
| − | |||
| − | |||
| − | |||
| − | |||
| − | |||
| − | |||
| − | |||
| − | |||
| − | |||
| − | |||
| − | |||
| − | |||
| − | |||
| − | |||
| − | |||
| − | |||
| − | |||
{| border="1" cellpadding="5" cellspacing="0" style="font-size:90%; text-align:center; margin:3px;" | {| border="1" cellpadding="5" cellspacing="0" style="font-size:90%; text-align:center; margin:3px;" | ||
| − | + | !style="background:black; color:white;" | [[Image:Chosen Icon.jpg|Chosen]] | |
| − | + | !style="background:black; color:white;" | [[Image:Temp Chest.jpg|36px|Carapace]] | |
| − | + | !style="background:black; color:white;" | [[Image:Temp Shoulders.jpg|36px|Shoulderguards]] | |
| − | + | !style="background:black; color:white;" | [[Image:CC Armor Gloves 003.jpg|36px|Gauntlets]] | |
| − | |||
| − | |||
| − | |||
| − | |||
| − | |||
| − | |||
| − | |||
| − | |||
| − | |||
| − | |||
| − | |||
| − | |||
| − | |||
| − | |||
| − | |||
| − | |||
| − | |||
| − | |||
| − | |||
| − | !style="background:black; color:white;" | [[Image:Chosen Icon.jpg|Chosen]] | ||
| − | !style="background:black; color:white;" | [[Image:Temp Chest.jpg|36px|Carapace]] | ||
| − | !style="background:black; color:white;" | [[Image:Temp Shoulders.jpg|36px|Shoulderguards]] | ||
| − | !style="background:black; color:white;" | [[Image:CC Armor Gloves 003.jpg|36px|Gauntlets]] | ||
!style="background:black; color:white;" | [[Image:CC Armor Boots 002.jpg|36px|Darkboots]] | !style="background:black; color:white;" | [[Image:CC Armor Boots 002.jpg|36px|Darkboots]] | ||
!style="background:black; color:white;" | [[Image:Temp Helm.jpg|36px|Skullcase]] | !style="background:black; color:white;" | [[Image:Temp Helm.jpg|36px|Skullcase]] | ||
| Line 1,725: | Line 1,863: | ||
!style="background:black; color:white;" | '''Total''' | !style="background:black; color:white;" | '''Total''' | ||
|- style="background:black; color:white;" | |- style="background:black; color:white;" | ||
| − | | align="left" | [[Image:Armor icon.jpg|Armor]] Armor || ''' | + | | align="left" | [[Image:Armor icon.jpg|Armor]] Armor || '''1303''' || '''1173''' || '''1042''' || '''1042''' || '''1173''' || rowspan="11" | || '''5733''' |
|- style="background:black; color:white;" | |- style="background:black; color:white;" | ||
| − | | align="left" | [[Image:Strength icon.jpg|Strength]] Strength || ''' | + | | align="left" | [[Image:Strength icon.jpg|Strength]] Strength || '''53''' || '''60''' || '''58''' || '''58''' || '''60''' || '''289''' |
|- style="background:black; color:white;" | |- style="background:black; color:white;" | ||
| − | | align="left" | [[Image:Toughness icon.jpg|Toughness]] Toughness || ''' | + | | align="left" | [[Image:Toughness icon.jpg|Toughness]] Toughness || '''75''' || '''46''' || '''49''' || '''-''' || '''-''' || '''170''' |
|- style="background:black; color:white;" | |- style="background:black; color:white;" | ||
| − | | align="left" | [[Image:Wounds icon.jpg|Wounds]] Wounds || ''' | + | | align="left" | [[Image:Wounds icon.jpg|Wounds]] Wounds || '''-''' || '''-''' || '''41''' || '''49''' || '''51''' || '''141''' |
|- style="background:black; color:white;" | |- style="background:black; color:white;" | ||
| − | | align="left" | [[Image:Initiative icon.jpg|Initiative]] Initiative || ''' | + | | align="left" | [[Image:Initiative icon.jpg|Initiative]] Initiative || '''44''' || '''51''' || '''-''' || '''41''' || '''46''' || '''182''' |
|- style="background:black; color:white;" | |- style="background:black; color:white;" | ||
| − | | align="left" | [[Image:Bulletpoint icon.jpg| | + | | align="left" | [[Image:Bulletpoint icon.jpg|AP Per Second]] AP Per Second || '''-''' || '''-''' || '''4''' || '''-''' || '''-''' || '''4''' |
|- style="background:black; color:white;" | |- style="background:black; color:white;" | ||
| − | | align="left" | [[Image: | + | | align="left" | [[Image:Melee crit icon.jpg|Critical Damage]] Critical Damage || '''-''' || '''6%''' || '''-''' || '''-''' || '''-''' || '''6%''' |
|- style="background:black; color:white;" | |- style="background:black; color:white;" | ||
| − | | align="left" | [[Image:Melee crit icon.jpg| | + | | align="left" | [[Image:Melee crit icon.jpg|Melee Critical Chance]] Melee Critical Chance || '''4%''' || '''-''' || '''2%''' || '''-''' || '''-''' || '''6%''' |
|- style="background:black; color:white;" | |- style="background:black; color:white;" | ||
| − | | align="left" | [[Image: | + | | align="left" | [[Image:Melee power icon.jpg|Melee Power]] Melee Power || '''40''' || '''-''' || '''-''' || '''-''' || '''40''' || '''80''' |
|- style="background:black; color:white;" | |- style="background:black; color:white;" | ||
| − | | align="left" | [[Image: | + | | align="left" | [[Image:Parry_icon.jpg|Parry]] Parry || '''-''' || '''-''' || '''-''' || '''2%''' || '''3%''' || '''5%''' |
|- style="background:black; color:white;" | |- style="background:black; color:white;" | ||
| − | | align="left" | [[Image: | + | | align="left" | [[Image:Parry_icon.jpg|Reduced Chance to be Parried]] Reduced Chance to be Parried || '''-''' || '''3%''' || '''-''' || '''2%''' || '''-''' || '''5%''' |
|- style="background:black; color:white;" | |- style="background:black; color:white;" | ||
| − | | colspan=" | + | | colspan="11" | '''Set Bonuses''' |
|- style="background:black; color:white;" | |- style="background:black; color:white;" | ||
| colspan="2" | '''(2 Piece Bonus)''' | | colspan="2" | '''(2 Piece Bonus)''' | ||
| − | | colspan=" | + | | colspan="9" | '''On Hit: <br /> 10% chance to reduce the next two heals<br /> on the target within 10 seconds by 516''' |
|- style="background:black; color:white;" | |- style="background:black; color:white;" | ||
| colspan="2" | '''(4 Piece Bonus)''' | | colspan="2" | '''(4 Piece Bonus)''' | ||
| − | | colspan=" | + | | colspan="9" | '''On Hit:<br /> 10% Chance to increase Melee<br /> power by 235 for 10 seconds''' |
| − | + | |} | |
| − | |||
| − | |||
| − | |||
| − | |||
| − | |||
| − | |||
| − | |||
| − | |||
| − | |||
| − | |||
| − | |||
| − | |||
| − | |||
| − | |||
| − | |||
| − | |||
| − | |||
| − | |||
| − | |||
| − | |||
| − | |||
| − | |||
| − | |||
| − | |||
| − | |||
| − | |||
| − | |||
| − | |||
| − | |||
| − | |||
| − | |||
| − | |||
| − | |||
| − | |||
| − | |||
| − | |||
| − | |||
| − | |||
| − | |||
| − | |||
| − | |||
| − | |||
| − | |||
| − | | | ||
| − | |||
| − | |||
|} | |} | ||
| + | |||
| + | <!--Back to top button--> | ||
| + | {| align=right style="border: 0px groove red; padding: 0px; margin: 0px" | ||
| + | |style="color: brown"|<span class="plainlinks">[http://wiki.theamazonbasin.com/index.php/Chosen Back To Top]</span> | ||
| + | |- | ||
| + | |style="color: brown"|<span class="plainlinks">[http://wiki.theamazonbasin.com/index.php/Chosen#Guides Back to Guides]</span> | ||
| + | |} <br /> | ||
| + | |||
| + | |||
| + | |||
| + | |||
| + | ---- | ||
| + | |||
| + | ====<u>Warpforged</u>==== | ||
| + | |||
| + | This armor can be bought from Overlord Steelhide in The Undercroft Or from Contested City / Skaven dungeon Stage 3 gold bags. | ||
| + | [[image:Warpforge.jpg | thumb | Warpforged Armor set]] | ||
| + | |||
| + | |||
| + | {| border="1" cellpadding="5" cellspacing="0" style="font-size:90%; text-align:center; margin:3px;" | ||
| + | ! | ||
| + | !Captain's Medallions | ||
| + | !Warpforged Crests | ||
| + | |- | ||
| + | |''Warpforged Gauntlets:'' || 805 || 208 | ||
| + | |- | ||
| + | |''Warpforged Darkboots:'' || 885 || 310 | ||
| + | |- | ||
| + | |''Warpforged Shoulderguards:'' || 925 || 440 | ||
| + | |- | ||
| + | |''Warpforged Skullcase:'' || 965 || 565 | ||
| + | |- | ||
| + | |''Warpforged Carapace:'' | ||
| + | | colspan="2" style="text-align: center;" | Obtained from quest at RR100(?) | ||
|} | |} | ||
| − | + | {| class="mw-collapsible mw-collapsed wikitable" style="background:#cccccc; border:solid grey 1px; text-align:center;" | |
| − | {| | + | ! '''Warpforged Accursed Defender Kit (Defensive)''' |
| − | + | ! '''Warpforged Accursed Defender Kit (Offensive)''' | |
|- | |- | ||
| − | | | + | | |
| − | |||
| − | |||
| − | |||
| − | |||
| − | |||
| − | |||
| − | |||
| − | |||
| − | |||
| − | |||
{| border="1" cellpadding="5" cellspacing="0" style="font-size:90%; text-align:center; margin:3px;" | {| border="1" cellpadding="5" cellspacing="0" style="font-size:90%; text-align:center; margin:3px;" | ||
| − | + | !style="background:black; color:white;" | [[Image:Chosen Icon.jpg|Chosen]] | |
| − | | | + | !style="background:black; color:white;" | [[Image:Temp Chest.jpg|36px|Carapace]] |
| − | [ | + | !style="background:black; color:white;" | [[Image:Temp Shoulders.jpg|36px|Shoulderguards]] |
| − | + | !style="background:black; color:white;" | [[Image:CC Armor Gloves 003.jpg|36px|Gauntlets]] | |
| − | | | + | !style="background:black; color:white;" | [[Image:CC Armor Boots 002.jpg|36px|Darkboots]] |
| − | [ | + | !style="background:black; color:white;" | [[Image:Temp Helm.jpg|36px|Skullcase]] |
| − | + | !style="background:black; color:white;" | | |
| − | |<style="color: | + | !style="background:black; color:white;" | '''Total''' |
| − | + | |- style="background:black; color:white;" | |
| − | + | | align="left" | [[Image:Armor icon.jpg|Armor]] Armor || '''1513''' || '''1362''' || '''1211''' || '''1211''' || '''1362''' || rowspan="11" | || '''-''' | |
| − | | | + | |- style="background:black; color:white;" |
| − | [ | + | | align="left" | [[Image:Strength icon.jpg|Strength]] Strength || '''-''' || '''-''' || '''53''' || '''62''' || '''63''' || '''-''' |
| − | + | |- style="background:black; color:white;" | |
| − | | | + | | align="left" | [[Image:Toughness icon.jpg|Toughness]] Toughness || '''66''' || '''80''' || '''75''' || '''75''' || '''78''' || '''-''' |
| − | [ | + | |- style="background:black; color:white;" |
| − | |- | + | | align="left" | [[Image:Wounds icon.jpg|Wounds]] Wounds || '''56''' || '''65''' || '''-''' || '''53''' || '''54''' || '''-''' |
| − | + | |- style="background:black; color:white;" | |
| − | | | + | | align="left" | [[Image:Initiative icon.jpg|Initiative]] Initiative || '''94''' || '''56''' || '''62''' || '''-''' || '''-''' || '''-''' |
| − | + | |- style="background:black; color:white;" | |
| − | + | | align="left" | [[Image:Bulletpoint icon.jpg|Hit Points Every 4 Seconds]] Hit Points Every 4 Seconds || '''60''' || '''-''' || '''-''' || '''-''' || '''20''' || '''-''' | |
| − | |<style="color: brown"|<span class="plainlinks"> | + | |- style="background:black; color:white;" |
| − | [http:// | + | | align="left" | [[Image:Bulletpoint icon.jpg|AP Per Second]] AP Per Second || '''-''' || '''1''' || '''2''' || '''-''' || '''-''' || '''-''' |
| − | + | |- style="background:black; color:white;" | |
| − | | | + | | align="left" | [[Image:Melee crit icon.jpg|Reduced Armor Penetration]] Reduced Armor Penetration || '''-''' || '''-''' || '''-''' || '''-''' || '''2''' || '''-''' |
| − | [http:// | + | |- style="background:black; color:white;" |
| + | | align="left" | [[Image:Bulletpoint icon.jpg|Reduction In Being Critically Hit]] Reduction In Being Critically Hit || '''1''' || '''3''' || '''4''' || '''-''' || '''4''' || '''-''' | ||
| + | |- style="background:black; color:white;" | ||
| + | | align="left" | [[Image:Bulletpoint icon.jpg|Fortitude]] Fortitude || '''-''' || '''40''' || '''20''' || '''-''' || '''-''' || '''-''' | ||
| + | |- style="background:black; color:white;" | ||
| + | | align="left" | [[Image:Block_icon.jpg|Block]] Block || '''-''' || '''-''' || '''-''' || '''3''' || '''4''' || '''-''' | ||
| + | |- style="background:black; color:white;" | ||
| + | | colspan="8" | '''Set Bonuses''' | ||
| + | |- style="background:black; color:white;" | ||
| + | | colspan="2" | '''(2 Piece Bonus)''' | ||
| + | | colspan="6" | '''On Being Attacked:<br /> 10% chance to increase<br /> Fortitude by 308 for 10 seconds''' | ||
| + | |- style="background:black; color:white;" | ||
| + | | colspan="2" | '''(4 Piece Bonus)''' | ||
| + | | colspan="6" | '''On Being Attacked:<br /> 10% chance to reduce incoming<br /> damage to your group by 10% for 10 seconds.''' | ||
| + | |- style="background:black; color:white;" | ||
| + | | colspan="2" | '''(5 Piece Bonus)''' | ||
| + | | colspan="6" | '''Gain ability:<br /> Inexorable Force''' | ||
| + | |} | ||
| + | | | ||
| + | {| border="1" cellpadding="5" cellspacing="0" style="font-size:90%; text-align:center; margin:3px;" | ||
| + | !style="background:black; color:white;" | [[Image:Chosen Icon.jpg|Chosen]] | ||
| + | !style="background:black; color:white;" | [[Image:Temp Chest.jpg|36px|Carapace]] | ||
| + | !style="background:black; color:white;" | [[Image:Temp Shoulders.jpg|36px|Shoulderguards]] | ||
| + | !style="background:black; color:white;" | [[Image:CC Armor Gloves 003.jpg|36px|Gauntlets]] | ||
| + | !style="background:black; color:white;" | [[Image:CC Armor Boots 002.jpg|36px|Darkboots]] | ||
| + | !style="background:black; color:white;" | [[Image:Temp Helm.jpg|36px|Skullcase]] | ||
| + | !style="background:black; color:white;" | | ||
| + | !style="background:black; color:white;" | '''Total''' | ||
| + | |- style="background:black; color:white;" | ||
| + | | align="left" | [[Image:Armor icon.jpg|Armor]] Armor || '''?''' || '''1362''' || '''1211''' || '''1211''' || '''1362''' || rowspan="11" | || '''-''' | ||
| + | |- style="background:black; color:white;" | ||
| + | | align="left" | [[Image:Strength icon.jpg|Strength]] Strength || '''?''' || '''80''' || '''75''' || '''75''' || '''78''' || '''-''' | ||
| + | |- style="background:black; color:white;" | ||
| + | | align="left" | [[Image:Toughness icon.jpg|Toughness]] Toughness || '''?''' || '''56''' || '''62''' || '''-''' || '''-''' || '''-''' | ||
| + | |- style="background:black; color:white;" | ||
| + | | align="left" | [[Image:Wounds icon.jpg|Wounds]] Wounds || '''?''' || '''-''' || '''53''' || '''62''' || '''63''' || '''-''' | ||
| + | |- style="background:black; color:white;" | ||
| + | | align="left" | [[Image:Initiative icon.jpg|Initiative]] Initiative || '''?''' || '''65''' || '''-''' || '''53''' || '''54''' || '''-''' | ||
| + | |- style="background:black; color:white;" | ||
| + | | align="left" | [[Image:Bulletpoint icon.jpg|AP Per Second]] AP Per Second || '''?''' || '''-''' || '''4''' || '''-''' || '''-''' || '''-''' | ||
| + | |- style="background:black; color:white;" | ||
| + | | align="left" | [[Image:Melee crit icon.jpg|Melee Critical Chance]] Melee Critical Chance || '''?''' || '''2%''' || '''2%''' || '''-''' || '''-''' || '''-''' | ||
| + | |- style="background:black; color:white;" | ||
| + | | align="left" | [[Image:Melee crit icon.jpg|Melee Critical Damage]] Melee Critical Damage || '''?''' || '''6%''' || '''-''' || '''-''' || '''4%''' || '''-''' | ||
| + | |- style="background:black; color:white;" | ||
| + | | align="left" | [[Image:Melee power icon.jpg|Melee Power]] Melee Power || '''?''' || '''-''' || '''20''' || '''20''' || '''40''' || '''-''' | ||
| + | |- style="background:black; color:white;" | ||
| + | | align="left" | [[Image:Parry_icon.jpg|Parry]] Parry || '''?''' || '''-''' || '''-''' || '''2%''' || '''4%''' || '''-''' | ||
| + | |- style="background:black; color:white;" | ||
| + | | align="left" | [[Image:Parry_icon.jpg|Reduced Chance to be Parried]] Reduced Chance to be Parried || '''?''' || '''3''' || '''-''' || '''2%''' || '''-''' || '''-''' | ||
| + | |- style="background:black; color:white;" | ||
| + | | colspan="8" | '''Set Bonuses''' | ||
| + | |- style="background:black; color:white;" | ||
| + | | colspan="2" | '''(2 Piece Bonus)''' | ||
| + | | colspan="6" | '''On Hit:<br /> 10% chance to reduce the next two<br /> heals on the target within 10 seconds by 662.''' | ||
| + | |- style="background:black; color:white;" | ||
| + | | colspan="2" | '''(4 Piece Bonus)''' | ||
| + | | colspan="6" | '''On Hit: <br /> 10 % chance to increase Melee Power<br /> by 308 for 10 seconds.''' | ||
| + | |- style="background:black; color:white;" | ||
| + | | colspan="2" | '''(5 Piece Bonus)''' | ||
| + | | colspan="6" | '''Gain Abiltiy:<br /> Leading The Charge.''' | ||
| + | |} | ||
| + | |} | ||
| + | |||
| + | |||
| + | <!--Back to top button--> | ||
| + | {| align=right style="border: 0px groove red; padding: 0px; margin: 0px" | ||
| + | |style="color: brown"|<span class="plainlinks">[http://wiki.theamazonbasin.com/index.php/Chosen Back To Top]</span> | ||
| + | |- | ||
| + | |style="color: brown"|<span class="plainlinks">[http://wiki.theamazonbasin.com/index.php/Chosen#Guides Back to Guides]</span> | ||
| + | |} <br /> | ||
| + | |||
| + | |||
| + | |||
| + | |||
| + | ---- | ||
| + | |} | ||
| + | |} | ||
| + | |||
| − | | | + | {| class="mw-collapsible mw-collapsed wikitable" style="background:#cccccc; border:solid grey 1px; text-align:center;" |
| − | [ | + | ! '''RVR Weapon Guide''' |
| − | + | |- | |
| − | | | + | | |
| − | [ | + | {| cellpadding="5" cellspacing="0" style="font-size:90%; text-align:left; margin:3px;" |
| − | + | |- style="background:white; color:black;" | |
| − | |- | + | | |
| − | + | '''Renown Rank 10 - 45 Weapons are bought from Hoardmaster Bloodaxe in the Undercroft section of the Inevitable City''' | |
| − | | | + | |
| − | [ | + | |
| − | + | ==='''Renown Rank 10'''=== | |
| − | | | + | ====Axes==== |
| − | [ | + | |
| − | + | ---- | |
| − | | | + | |
| − | [ | + | ====Great Swords==== |
| − | + | ||
| − | | | + | ---- |
| − | [ | + | |
| − | + | ====Shields==== | |
| − | |<style="color: brown"|<span class="plainlinks"> | + | |
| − | [ | + | ---- |
| − | | | + | |
| − | + | ====Swords==== | |
| + | |||
| + | ---- | ||
| + | |||
| + | ====Great Axes==== | ||
| + | |||
| + | ---- | ||
| + | |||
| + | ==='''Renown Rank 19'''=== | ||
| + | ====Axes==== | ||
| + | |||
| + | ---- | ||
| + | |||
| + | ====Great Swords==== | ||
| + | |||
| + | ---- | ||
| + | |||
| + | ====Shields==== | ||
| + | |||
| + | ---- | ||
| + | |||
| + | ====Swords==== | ||
| + | |||
| + | ---- | ||
| + | |||
| + | ====Great Axes==== | ||
| + | |||
| + | ---- | ||
| + | |||
| + | ==='''Renown Rank 24'''=== | ||
| + | ====Axes==== | ||
| + | |||
| + | ---- | ||
| + | |||
| + | ====Great Swords==== | ||
| + | |||
| + | ---- | ||
| + | |||
| + | ====Shields==== | ||
| + | |||
| + | ---- | ||
| + | |||
| + | ====Swords==== | ||
| + | |||
| + | ---- | ||
| + | |||
| + | ====Great Axes==== | ||
| + | |||
| + | ---- | ||
| + | |||
| + | ==='''Renown Rank 29'''=== | ||
| + | ====Axes==== | ||
| + | |||
| + | ---- | ||
| + | |||
| + | ====Great Swords==== | ||
| + | |||
| + | ---- | ||
| + | |||
| + | ====Shields==== | ||
| + | |||
| + | ---- | ||
| + | |||
| + | ====Swords==== | ||
| + | |||
| + | ---- | ||
| + | |||
| + | ====Great Axes==== | ||
| + | |||
| + | ---- | ||
| + | |||
| + | ==='''Renown Rank 34'''=== | ||
| + | ====Axes==== | ||
| + | |||
| + | ---- | ||
| + | |||
| + | ====Great Swords==== | ||
| + | |||
| + | ---- | ||
| + | |||
| + | ====Shields==== | ||
| + | |||
| + | ---- | ||
| + | |||
| + | ====Swords==== | ||
| + | |||
| + | ---- | ||
| + | |||
| + | ====Great Axes==== | ||
| + | |||
| + | ---- | ||
| + | |||
| + | ==='''Renown Rank 39'''=== | ||
| + | ====Axes==== | ||
| + | |||
| + | ---- | ||
| + | |||
| + | ====Great Swords==== | ||
| + | |||
| + | ---- | ||
| + | |||
| + | ====Shields==== | ||
| + | |||
| + | ---- | ||
| + | |||
| + | ====Swords==== | ||
| + | |||
| + | ---- | ||
| + | |||
| + | ====Great Axes==== | ||
| + | |||
| + | ---- | ||
| + | |||
| + | ==='''Renown Rank 45'''=== | ||
| + | ====Axes==== | ||
| + | |||
| + | ---- | ||
| + | |||
| + | ====Great Swords==== | ||
| + | |||
| + | ---- | ||
| + | |||
| + | ==== Shields==== | ||
| + | |||
| + | [[image:RR45_shield.jpg | thumb | RR 44 Shield Skin]] | ||
| + | |||
| + | |||
| + | {| border="1" cellpadding="5" cellspacing="0" style="font-size:90%; text-align:center; margin:3px;" | ||
| + | ! | ||
| + | !'''Officer's Emblems''' | ||
| + | !'''Conqueror's Insignia''' | ||
| + | |- | ||
| + | |''Shieldbearer's Herald of Tyrany:'' || '''255''' || '''205''' | ||
| + | |- | ||
| + | |''Sentry's Herald of Tyranny:'' || '''355''' || '''205''' | ||
| + | |} | ||
| + | |||
| + | |||
| + | {| class="mw-collapsible mw-collapsed wikitable" style="background:#cccccc; border:solid grey 1px; text-align:center;" | ||
| + | ! '''Tyranny Shields''' | ||
| + | |- | ||
| + | | | ||
| + | {| border="1" cellpadding="5" cellspacing="0" style="font-size:90%; text-align:center; margin:3px;" | ||
| + | !style="background:black; color:white;" | [[Image:Chosen Icon.jpg|Chosen]] | ||
| + | !style="background:black; color:white;" | [[Image:Tyranny.jpg|36px|Shieldbearer's Herald of Tyranny]] | ||
| + | !style="background:black; color:white;" | [[Image:Tyranny.jpg|36px|Sentry's Herald of Tyranny]] | ||
| + | |- style="background:black; color:white;" | ||
| + | | align="left" | [[Image:Armor icon.jpg|Block Rating]] Block Rating || '''390''' || '''390''' | ||
| + | |- style="background:black; color:white;" | ||
| + | | align="left" | [[Image:Toughness icon.jpg|Toughness]] Toughness || '''27''' || '''-''' | ||
| + | |- style="background:black; color:white;" | ||
| + | | align="left" | [[Image:Wounds icon.jpg|Wounds]] Wounds || '''19''' || '''27''' | ||
| + | |- style="background:black; color:white;" | ||
| + | | align="left" | [[Image:Initiative icon.jpg|Initiative]] Initiative || '''-''' || '''20''' | ||
| + | |- style="background:black; color:white;" | ||
| + | | align="left" | [[Image:Bulletpoint icon.jpg|Hit Points Every 4 Seconds]] Hit Points Every 4 Seconds || '''-''' || '''32''' | ||
| + | |- style="background:black; color:white;" | ||
| + | | align="left" | [[Image:Bulletpoint icon.jpg|AP Per Second]] AP Per Second || '''-''' || '''2''' | ||
| + | |- style="background:black; color:white;" | ||
| + | | align="left" | [[Image:Block_icon.jpg|Block]] Block || '''2%''' || '''-''' | ||
| + | |- style="background:black; color:white;" | ||
| + | | align="left" | [[Image:Parry_icon.jpg|Parry]] Parry || '''2%''' || '''-''' | ||
| + | |- style="background:black; color:white;" | ||
| + | | align="left" | [[Image:Melee crit icon.jpg|Reduced Armor Penetration]] Reduced Armor Penetration || '''1%''' || '''-''' | ||
| + | |- style="background:black; color:white;" | ||
| + | | align="left" | [[Image:Bulletpoint icon.jpg|Reduction In Being Critically Hit]] Reduction In Being Critically Hit || '''-''' || '''2%''' | ||
| + | |} | ||
| + | |} | ||
| + | |||
| + | ---- | ||
| + | |||
| + | ====Swords==== | ||
| + | |||
| + | ---- | ||
| + | |||
| + | ====Great Axes==== | ||
| + | |||
| + | ---- | ||
| + | |||
| + | |||
| + | '''Renow Rank 55 - 100 Weapons are bought from Overlord Darkedge in the Undercroft section of the Inevitable City''' | ||
| + | |||
| + | ==='''Renown Rank 55'''=== | ||
| + | |||
| + | ====Axes==== | ||
| + | |||
| + | ---- | ||
| + | |||
| + | ====Great Swords==== | ||
| + | |||
| + | ---- | ||
| + | |||
| + | ====Shields==== | ||
| + | |||
| + | [[image:RR55_shield.jpg | thumb | RR55 Shield Skin]] | ||
| + | |||
| + | |||
| + | {| border="1" cellpadding="5" cellspacing="0" style="font-size:90%; text-align:center; margin:3px;" | ||
| + | ! | ||
| + | !'''Officer's Emblems''' | ||
| + | !'''Invader's Insignia''' | ||
| + | |- | ||
| + | |''Harbinger of Obliteration:'' || '''375''' || '''220''' | ||
| + | |- | ||
| + | |''Harbinger of Annihilation:'' || '''375''' || '''220''' | ||
| + | |} | ||
| + | |||
| + | |||
| + | {| class="mw-collapsible mw-collapsed wikitable" style="background:#cccccc; border:solid grey 1px; text-align:center;" | ||
| + | ! '''Anathema Shields''' | ||
| + | |- | ||
| + | | | ||
| + | {| border="1" cellpadding="5" cellspacing="0" style="font-size:90%; text-align:center; margin:3px;" | ||
| + | !style="background:black; color:white;" | [[Image:Chosen Icon.jpg|Chosen]] | ||
| + | !style="background:black; color:white;" | [[Image:Tyranny.jpg|36px|Shieldbearer's Herald of Anathema]] | ||
| + | !style="background:black; color:white;" | [[Image:Tyranny.jpg|36px|Sentry's Herald of Anathema]] | ||
| + | |- style="background:black; color:white;" | ||
| + | | align="left" | [[Image:Armor icon.jpg|Block Rating]] Block Rating || '''424''' || '''424''' | ||
| + | |- style="background:black; color:white;" | ||
| + | | align="left" | [[Image:Toughness icon.jpg|Toughness]] Toughness || '''31''' || '''-''' | ||
| + | |- style="background:black; color:white;" | ||
| + | | align="left" | [[Image:Wounds icon.jpg|Wounds]] Wounds || '''20''' || '''31''' | ||
| + | |- style="background:black; color:white;" | ||
| + | | align="left" | [[Image:Initiative icon.jpg|Initiative]] Initiative || '''-''' || '''21''' | ||
| + | |- style="background:black; color:white;" | ||
| + | | align="left" | [[Image:Bulletpoint icon.jpg|Hit Points Every 4 Seconds]] Hit Points Every 4 Seconds || '''-''' || '''36''' | ||
| + | |- style="background:black; color:white;" | ||
| + | | align="left" | [[Image:Bulletpoint icon.jpg|AP Per Second]] AP Per Second || '''-''' || '''2''' | ||
| + | |- style="background:black; color:white;" | ||
| + | | align="left" | [[Image:Block_icon.jpg|Block]] Block || '''2%''' || '''-''' | ||
| + | |- style="background:black; color:white;" | ||
| + | | align="left" | [[Image:Parry_icon.jpg|Parry]] Parry || '''2%''' || '''-''' | ||
| + | |- style="background:black; color:white;" | ||
| + | | align="left" | [[Image:Melee crit icon.jpg|Reduced Armor Penetration]] Reduced Armor Penetration || '''1%''' || '''-''' | ||
| + | |- style="background:black; color:white;" | ||
| + | | align="left" | [[Image:Bulletpoint icon.jpg|Reduction In Being Critically Hit]] Reduction In Being Critically Hit || '''-''' || '''2%''' | ||
| + | |} | ||
| + | |} | ||
| + | |||
| + | ---- | ||
| + | |||
| + | ====Swords==== | ||
| + | |||
| + | ---- | ||
| + | |||
| + | ====Great Axes==== | ||
| + | |||
| + | ---- | ||
| + | |||
| + | |||
| + | ==='''Renown Rank 65'''=== | ||
| + | |||
| + | ====Axes==== | ||
| + | |||
| + | ---- | ||
| + | |||
| + | ====Great Swords==== | ||
| + | |||
| + | ---- | ||
| + | |||
| + | ====Shields==== | ||
| + | |||
| + | [[image:RR65_shield.jpg | thumb | RR65 Shield Skin]] | ||
| + | |||
| + | |||
| + | {| border="1" cellpadding="5" cellspacing="0" style="font-size:90%; text-align:center; margin:3px;" | ||
| + | ! | ||
| + | !'''Officer's Emblem''' | ||
| + | !'''Warlord's Insignias''' | ||
| + | |- | ||
| + | |''Shieldberarer's Herald of Infamy:'' || '''390''' || '''225''' | ||
| + | |- | ||
| + | |''Sentry's Herald of Infamy:'' || '''390''' || '''225''' | ||
| + | |} | ||
| + | |||
| + | |||
| + | {| class="mw-collapsible mw-collapsed wikitable" style="background:#cccccc; border:solid grey 1px; text-align:center;" | ||
| + | ! '''Infamy Shields''' | ||
| + | |- | ||
| + | | | ||
| + | {| border="1" cellpadding="5" cellspacing="0" style="font-size:90%; text-align:center; margin:3px;" | ||
| + | !style="background:black; color:white;" | [[Image:Chosen Icon.jpg|Chosen]] | ||
| + | !style="background:black; color:white;" | [[Image:Tyranny.jpg|36px|Shieldberare's Herald of Infamy]] | ||
| + | !style="background:black; color:white;" | [[Image:Tyranny.jpg|36px|Sentry's Herald of Infamy]] | ||
| + | |- style="background:black; color:white;" | ||
| + | | align="left" | [[Image:Armor icon.jpg|Block Rating]] Block Rating || '''450''' || '''450''' | ||
| + | |- style="background:black; color:white;" | ||
| + | | align="left" | [[Image:Toughness icon.jpg|Toughness]] Toughness || '''32''' || '''-''' | ||
| + | |- style="background:black; color:white;" | ||
| + | | align="left" | [[Image:Wounds icon.jpg|Wounds]] Wounds || '''21''' || '''32''' | ||
| + | |- style="background:black; color:white;" | ||
| + | | align="left" | [[Image:Initiative icon.jpg|Initiative]] Initiative || '''-''' || '''22''' | ||
| + | |- style="background:black; color:white;" | ||
| + | | align="left" | [[Image:Bulletpoint icon.jpg|Hit Points Every 4 Seconds]] Hit Points Every 4 Seconds || '''-''' || '''36''' | ||
| + | |- style="background:black; color:white;" | ||
| + | | align="left" | [[Image:Bulletpoint icon.jpg|AP Per Second]] AP Per Second || '''-''' || '''3''' | ||
| + | |- style="background:black; color:white;" | ||
| + | | align="left" | [[Image:Block_icon.jpg|Block]] Block || '''2%''' || '''-''' | ||
| + | |- style="background:black; color:white;" | ||
| + | | align="left" | [[Image:Parry_icon.jpg|Parry]] Parry || '''2%''' || '''-''' | ||
| + | |- style="background:black; color:white;" | ||
| + | | align="left" | [[Image:Melee crit icon.jpg|Reduced Armor Penetration]] Reduced Armor Penetration || '''2%''' || '''-''' | ||
| + | |- style="background:black; color:white;" | ||
| + | | align="left" | [[Image:Bulletpoint icon.jpg|Reduction In Being Critically Hit]] Reduction In Being Critically Hit || '''-''' || '''2%''' | ||
| + | |} | ||
| + | |} | ||
| + | |||
| + | ---- | ||
| + | |||
| + | ====Swords==== | ||
| + | |||
| + | ---- | ||
| + | |||
| + | ====Great Axes==== | ||
| + | |||
| + | ---- | ||
| + | |||
| + | ==='''Renown Rank 75'''=== | ||
| + | |||
| + | ====Axes==== | ||
| + | |||
| + | ---- | ||
| + | |||
| + | ====Great Swords==== | ||
| + | |||
| + | ---- | ||
| + | |||
| + | ====Shields==== | ||
| + | |||
| + | [[image:RR75_shield.jpg | thumb | RR75 Shield Skin]] | ||
| + | |||
| + | |||
| + | {| border="1" cellpadding="5" cellspacing="0" style="font-size:90%; text-align:center; margin:3px;" | ||
| + | ! | ||
| + | !'''Officer's Emblems''' | ||
| + | !'''Royal Insignias''' | ||
| + | |- | ||
| + | |''Shieldbearer's Herald of Reckoning:'' || '''400''' || '''230''' | ||
| + | |- | ||
| + | |''Sentry's Herald of Reckoning:'' || '''400''' || '''230''' | ||
| + | |} | ||
| + | |||
| + | |||
| + | {| class="mw-collapsible mw-collapsed wikitable" style="background:#cccccc; border:solid grey 1px; text-align:center;" | ||
| + | ! '''Reckoning Shields''' | ||
| + | |- | ||
| + | | | ||
| + | {| border="1" cellpadding="5" cellspacing="0" style="font-size:90%; text-align:center; margin:3px;" | ||
| + | !style="background:black; color:white;" | [[Image:Chosen Icon.jpg|Chosen]] | ||
| + | !style="background:black; color:white;" | [[Image:Tyranny.jpg|36px|Shieldbearer's Herald of Reckoning]] | ||
| + | !style="background:black; color:white;" | [[Image:Tyranny.jpg|36px|Sentry's Herald of Reckoning]] | ||
| + | |- style="background:black; color:white;" | ||
| + | | align="left" | [[Image:Armor icon.jpg|Block Rating]] Block Rating || '''484''' || '''484''' | ||
| + | |- style="background:black; color:white;" | ||
| + | | align="left" | [[Image:Toughness icon.jpg|Toughness]] Toughness || '''35''' || '''-''' | ||
| + | |- style="background:black; color:white;" | ||
| + | | align="left" | [[Image:Wounds icon.jpg|Wounds]] Wounds || '''25''' || '''35''' | ||
| + | |- style="background:black; color:white;" | ||
| + | | align="left" | [[Image:Initiative icon.jpg|Initiative]] Initiative || '''-''' || '''25''' | ||
| + | |- style="background:black; color:white;" | ||
| + | | align="left" | [[Image:Bulletpoint icon.jpg|Hit Points Every 4 Seconds]] Hit Points Every 4 Seconds || '''-''' || '''40''' | ||
| + | |- style="background:black; color:white;" | ||
| + | | align="left" | [[Image:Bulletpoint icon.jpg|AP Per Second]] AP Per Second || '''-''' || '''3''' | ||
| + | |- style="background:black; color:white;" | ||
| + | | align="left" | [[Image:Block_icon.jpg|Block]] Block || '''2%''' || '''-''' | ||
| + | |- style="background:black; color:white;" | ||
| + | | align="left" | [[Image:Parry_icon.jpg|Parry]] Parry || '''2%''' || '''-''' | ||
| + | |- style="background:black; color:white;" | ||
| + | | align="left" | [[Image:Melee crit icon.jpg|Reduced Armor Penetration]] Reduced Armor Penetration || '''2%''' || '''-''' | ||
| + | |- style="background:black; color:white;" | ||
| + | | align="left" | [[Image:Bulletpoint icon.jpg|Reduction In Being Critically Hit]] Reduction In Being Critically Hit || '''-''' || '''2%''' | ||
| + | |} | ||
| + | |} | ||
| + | |||
| + | ---- | ||
| + | |||
| + | ====Swords==== | ||
| + | |||
| + | ---- | ||
| + | |||
| + | ====Great Axes==== | ||
| + | |||
| + | ---- | ||
| + | |||
| + | |||
| + | ==='''Renown Rank 81'''=== | ||
| + | |||
| + | ====Axes==== | ||
| + | |||
| + | ---- | ||
| + | |||
| + | ====Great Swords==== | ||
| + | |||
| + | ---- | ||
| + | |||
| + | ====Shields==== | ||
| + | |||
| + | [[image:RR81_shield.jpg | thumb | RR81 Shield Skin]] | ||
| + | |||
| + | |||
| + | {| border="1" cellpadding="5" cellspacing="0" style="font-size:90%; text-align:center; margin:3px;" | ||
| + | ! | ||
| + | !'''Captain's Emblems''' | ||
| + | !'''Royal Insignias''' | ||
| + | |- | ||
| + | |''Harbinger of Obliteration:'' || '''730''' || '''430''' | ||
| + | |- | ||
| + | |''Harbinger of Annihilation:'' || '''730''' || '''430''' | ||
| + | |} | ||
| + | |||
| + | |||
| + | {| class="mw-collapsible mw-collapsed wikitable" style="background:#cccccc; border:solid grey 1px; text-align:center;" | ||
| + | ! '''Vice Shields''' | ||
| + | |- | ||
| + | | | ||
| + | {| border="1" cellpadding="5" cellspacing="0" style="font-size:90%; text-align:center; margin:3px;" | ||
| + | !style="background:black; color:white;" | [[Image:Chosen Icon.jpg|Chosen]] | ||
| + | !style="background:black; color:white;" | [[Image:Tyranny.jpg|36px|Shieldbearer's Herald of Vice]] | ||
| + | !style="background:black; color:white;" | [[Image:Tyranny.jpg|36px|Sentry's Herald of Vice]] | ||
| + | |- style="background:black; color:white;" | ||
| + | | align="left" | [[Image:Armor icon.jpg|Block Rating]] Block Rating || '''534''' || '''534''' | ||
| + | |- style="background:black; color:white;" | ||
| + | | align="left" | [[Image:Toughness icon.jpg|Toughness]] Toughness || '''47''' || '''-''' | ||
| + | |- style="background:black; color:white;" | ||
| + | | align="left" | [[Image:Wounds icon.jpg|Wounds]] Wounds || '''41''' || '''50''' | ||
| + | |- style="background:black; color:white;" | ||
| + | | align="left" | [[Image:Initiative icon.jpg|Initiative]] Initiative || '''-''' || '''45''' | ||
| + | |- style="background:black; color:white;" | ||
| + | | align="left" | [[Image:Bulletpoint icon.jpg|Hit Points Every 4 Seconds]] Hit Points Every 4 Seconds || '''-''' || '''40''' | ||
| + | |- style="background:black; color:white;" | ||
| + | | align="left" | [[Image:Bulletpoint icon.jpg|AP Per Second]] AP Per Second || '''-''' || '''3''' | ||
| + | |- style="background:black; color:white;" | ||
| + | | align="left" | [[Image:Block_icon.jpg|Block]] Block || '''3%''' || '''-''' | ||
| + | |- style="background:black; color:white;" | ||
| + | | align="left" | [[Image:Parry_icon.jpg|Parry]] Parry || '''3%''' || '''-''' | ||
| + | |- style="background:black; color:white;" | ||
| + | | align="left" | [[Image:Melee crit icon.jpg|Reduced Armor Penetration]] Reduced Armor Penetration || '''2%''' || '''-''' | ||
| + | |- style="background:black; color:white;" | ||
| + | | align="left" | [[Image:Bulletpoint icon.jpg|Reduction In Being Critically Hit]] Reduction In Being Critically Hit || '''-''' || '''3%''' | ||
| + | |} | ||
| + | |} | ||
| + | |||
| + | ---- | ||
| + | |||
| + | ====Swords==== | ||
| + | |||
| + | ---- | ||
| + | |||
| + | ====Great Axes==== | ||
| + | |||
| + | ---- | ||
| + | |||
| + | |||
| + | ==='''Renown Rank 90'''=== | ||
| + | |||
| + | ====Axes==== | ||
| + | |||
| + | ---- | ||
| + | |||
| + | ====Great Swords==== | ||
| + | |||
| + | ---- | ||
| + | |||
| + | ====Shields==== | ||
| + | |||
| + | ---- | ||
| + | |||
| + | ====Swords==== | ||
| + | |||
| + | ---- | ||
| + | |||
| + | ====Great Axes==== | ||
| + | |||
| + | ---- | ||
| + | |||
| + | |||
| + | ==='''Renown Rank 100'''=== | ||
| + | |||
| + | ====Axes==== | ||
| + | |||
| + | ---- | ||
| + | |||
| + | ====Great Swords==== | ||
| + | |||
| + | ---- | ||
| + | |||
| + | ====Shields==== | ||
| + | |||
| + | [[image:RR100 shield.jpg | thumb | RR100 Shield skin]] | ||
| + | |||
| + | |||
| + | {| border="1" cellpadding="5" cellspacing="0" style="font-size:90%; text-align:center; margin:3px;" | ||
| + | ! | ||
| + | !Captains Emblems | ||
| + | !Warpforged | ||
| + | |- | ||
| + | |''Harbinger of Obliteration:'' || '''860''' || '''500''' | ||
| + | |- | ||
| + | |''Harbinger of Annihilation:'' || '''860''' || '''500''' | ||
| + | |} | ||
| + | |||
| + | |||
| + | {| class="mw-collapsible mw-collapsed wikitable" style="background:#cccccc; border:solid grey 1px; text-align:center;" | ||
| + | ! '''Harbinger''' | ||
| + | |- | ||
| + | | | ||
| + | {| border="1" cellpadding="5" cellspacing="0" style="font-size:90%; text-align:center; margin:3px;" | ||
| + | !style="background:black; color:white;" | [[Image:Chosen Icon.jpg|Chosen]] | ||
| + | !style="background:black; color:white;" | [[Image:Temp Shield.jpg|36px|Harbinger of Obliteration]] | ||
| + | !style="background:black; color:white;" | [[Image:Temp Shield.jpg|36px|Harbinger of Annihilation]] | ||
| + | |- style="background:black; color:white;" | ||
| + | | align="left" | [[Image:Armor icon.jpg|Block Rating]] Block Rating || '''721''' || '''721''' | ||
| + | |- style="background:black; color:white;" | ||
| + | | align="left" | [[Image:Toughness icon.jpg|Toughness]] Toughness || '''95''' || '''-''' | ||
| + | |- style="background:black; color:white;" | ||
| + | | align="left" | [[Image:Wounds icon.jpg|Wounds]] Wounds || '''86''' || '''98''' | ||
| + | |- style="background:black; color:white;" | ||
| + | | align="left" | [[Image:Initiative icon.jpg|Initiative]] Initiative || '''-''' || '''89''' | ||
| + | |- style="background:black; color:white;" | ||
| + | | align="left" | [[Image:Bulletpoint icon.jpg|Hit Points Every 4 Seconds]] Hit Points Every 4 Seconds || '''-''' || '''80''' | ||
| + | |- style="background:black; color:white;" | ||
| + | | align="left" | [[Image:Bulletpoint icon.jpg|AP Per Second]] AP Per Second || '''-''' || '''4''' | ||
| + | |- style="background:black; color:white;" | ||
| + | | align="left" | [[Image:Bulletpoint icon.jpg|Morale Per Second]] Morale Per Second || '''3''' || '''-''' | ||
| + | |- style="background:black; color:white;" | ||
| + | | align="left" | [[Image:Block_icon.jpg|Block]] Block || '''4%''' || '''-''' | ||
| + | |- style="background:black; color:white;" | ||
| + | | align="left" | [[Image:Parry_icon.jpg|Parry]] Parry || '''4%''' || '''-''' | ||
| + | |- style="background:black; color:white;" | ||
| + | | align="left" | [[Image:Melee crit icon.jpg|Reduced Armor Penetration]] Reduced Armor Penetration || '''4%''' || '''-''' | ||
| + | |- style="background:black; color:white;" | ||
| + | | align="left" | [[Image:Bulletpoint icon.jpg|Reduction In Being Critically Hit]] Reduction In Being Critically Hit || '''-''' || '''4%''' | ||
| + | |} | ||
| + | |} | ||
| + | |||
| + | ---- | ||
| + | |||
| + | ====Swords==== | ||
| + | |||
| + | ---- | ||
| + | |||
| + | ====Great Axes==== | ||
| + | |||
| + | ---- | ||
| + | |||
| + | |} | ||
| + | |} | ||
| + | |||
| + | ==Media== | ||
| + | ===Concept Art=== | ||
| + | {| border="1" cellpadding="5" cellspacing="0" style="font-size:90%; text-align:center; margin:3px;" | ||
| + | |||
| + | <!---ROW 4--> | ||
| + | |||
| + | |<style="color: brown"|<span class="plainlinks"> | ||
| + | [[image:Chosen new armor (old).jpg | thumb | 150px |Chosen armor design concepts]] | ||
| + | |} | ||
| + | |||
| + | <!--Back to top button--> | ||
| + | {| align=right style="border: 0px groove red; padding: 0px; margin: 0px" | ||
| + | |style="color: brown"|<span class="plainlinks">[http://wiki.theamazonbasin.com/index.php/Chosen Back To Top]</span> | ||
| + | |} | ||
| + | |||
| + | |||
| + | ---- | ||
| + | |||
| + | ===Screenshots=== | ||
| − | |||
| − | |||
| − | |||
| − | |||
| − | |||
| − | |||
| − | |||
| − | |||
| − | |||
| − | |||
| − | |||
| − | |||
| − | |||
==Sources== | ==Sources== | ||
| − | [http://bootaesbloodyblog.blogspot.com/ | + | *[http://bootaesbloodyblog.blogspot.com/ Bootaes Bloody Blog] |
| − | + | *[https://web.archive.org/web/20131227194117/http://ageofreckoning.warhammeronline.com/Chosen Chosen] (Warhammer Online) | |
| − | [http://warhammeronline.com Warhammer Online | + | *[https://web.archive.org/web/20131110185355/http://war.allakhazam.com/ Zam.com] |
| − | |||
| − | [[Category: | + | [[Category:Warhammer Online]] |
| − | |||
Latest revision as of 09:47, 29 April 2014
|
Warhammer Online >> Destruction >> Chaos >> Chosen
"My name? Long ago, such worthless details fell from memory. I know only the lust for glorious battle - for blood, for victory! I seek only the Eye of Tzeentch - his favour, his grace, his Dark Gifts - that through them, I may be remade - reborn! Why do we raid your lands? Why do we burn your homes? Why do we flay your flesh? To serve the Lord of Change and his magnificent designs."
The Chosen of Tzeentch SpecialtyTzeentch expects his Champions to be both ferocious warriors and cunning tacticians. As a result, Chosen who excel in these areas are granted profane rewards. These Dark Gifts allow the Chosen to manipulate the ruinous power of Chaos itself. While this provides them with ever greater strength, it also continually strips away any remnants of humanity that may still reside in the dark recesses of their memories. These Dark Gifts supplement the warrior’s awesome martial skills, increasing their durability, strength and even allowing them to harness the Winds of Magic.
Playing as the ChosenAbove all else, as a Chosen Champion, you will seek the esteem of Tzeentch. Yours is an arduous path, forever seeking out greater glory in the eyes of the Raven God by playing a crucial role in his terrible schemes and cruel manipulations. Encased in a blasphemous panoply of heavy armor, you will endeavor to place yourself on the front line of every battle, where you will bring to bear the power of your Dark Gifts against your foes. You will also often be called upon to protect the insignificant or the weak, not as an act of compassion, but rather in service to the inscrutable machinations of your treacherous god.
Fighting the ChosenOnly death - either yours or theirs - brings any hope of respite from the fear and confusion that the Chosen inspire and the devastation they wreak on the battlefield. The best choice is almost certainly to do anything and everything you can to eliminate the Chosen from the fight as quickly as possible. They are devious and manipulative, and it is unwise to give them any opportunity to use their Dark Gifts to guide the course of a battle. Since they are most dangerous at close range, wise groups will focus magical and ranged attacks on them early in the fight. Failing that, your only hope is a focused, heavy melee attack – though it will certainly be a race against the dark and creeping terror such close proximity to the monstrous Chosen will instill in you and your allies.
The Look of the Chosen
Career MasteriesDo not be mislead by appearances, for they are the first weapon of the Chosen. Covered from head to toe in unholy armor, wielding massive weapons capable of rending enemies limb from limb, the Chosens are hulking figures of dread and terror on the battlefield - but woe to the enemy who dismisses them as simple brutes! Tzeentch's Chosen are cunning warriors who can bring forth a whisper of the Ruinous Powers into this world, dooming their enemies to a fate that is, perhaps, worse than a simple death. The Chosen have been blessed by Tzeentch with several dark gifts, powers of Chaos which they can grasp and pull into this world through their very bodies. These powers pour forth from within their massive armor, and spill out as profane auras. In addition to causing an immediate effect when they first burst out from the Chosen's grasp, these lingering effects will continue to empower the player for several moments, allowing them to unleash melee attacks fueled by the unholy power of Tzeentch himself.
Path of DreadThe Path of Dread is focused on directly and brutally crushing your foes. A master of Dread will be likely to favor a Greatweapon instead of a shield, greatly increasing their offensive power at the cost of sacrificing the protections that a shield would otherwise offer. They will be easily capable of picking up a shield when the situation calls for it...but they won't be happy about it.
Path of CorruptionThe Path of Corruption is a cunning Mastery for those who prefer to outlast their enemies, letting their foes beat in futility on a massive shield until they're exhausted, and then crushing them with deliberate and vicious attacks. A specialist in Corruption will be the person who defines where the lines of battle will be drawn, since they -are- the front lines.
Path of DiscordThe Path of Discord is one that delves more deeply into Tzeentch's gifts, and masters of Discord more fully understand how to manipulate the Chaos forces that swirl within them. They can unleash blasts of magical power, or twist the magical energies to unnaturally enhance their melee attacks. Their understanding of the nature of magic is still relatively shallow, however, and they can not hope to approach the skill or power of a true magus, but even their brief flashes of otherworldly energy are enough to empower them as potent melee combatants.
Common BuildsPVE: TankingSo this one is a pure PvE spec and needs little explanation. It combines Oppression and Crippling Strikes to provide a total of 40% extra damage reduction and then slaps on a 25% parry increase from Mixed Defenses for 5 seconds after you block. Since in PvE you’ll block all the time, this means it’s constantly active. http://3.bp.blogspot.com/_YbXHpJPLjjM/TLmo6tPYA2I/AAAAAAAAAnY/4enObt2XNQA/s1600/chosen-spec4.jpg Key tactics/abilities Crippling Strikes – when crit target will deal 25% less damage for 10 seconds Mixed Defenses – Any time you block an attack you chance to parry in increased by 25% for 5 seconds Oppression – Increases your armor by 1014 for 20 seconds and reduces damage taken by 15% for 10 seconds Downfall – 3 second single target knock down Dreadful Terror – Nobody complains about extra AP in PvE.
PVP/PVE: Dread/DiscordThis is probably the single most popular spec for Chosen and for good reason. It combines high damage when using great weapons, increased AoE damage, Quake’s stagger AND turns you into a Crippling Strikes AoE delivery system, which is of great benefit to your fellow Destruction players. http://3.bp.blogspot.com/_YbXHpJPLjjM/TLmoxPPXmiI/AAAAAAAAAnQ/ONJGKCAbS2k/s1600/chosen-spec2.jpg Key tactics/abilities Quake – CAOE stagger Crippling Strikes (tactic) – Anyone you crit will do 25% less damage Oppressing Blows (tactic) – 15% increased crit chance with great weapons Rending Blade – Every 5 seconds you can do a cone AoE which will most likely crit and apply Crippling Strikes. note - good additions to this build are dreadful terror and discordant turbulence
PVP: anti-magicI don’t play this spec very often, but I have tried it, it did work and I know quite a few people use it. The trick to it is combining Tzeentch’s Reflection with Hold the Line and getting your disrupt chance very high (80%+ is easy), since with Tzeentch’s Reflection active every disrupt you do will silence the enemy. Combine that further with Siphoned Energy and you can get a reasonable self heal in some situations, as well as a speed buff. What is important to remember however is because of immunity timers, the silence will not always work. This spec can work very well though as a guard for a bombing Sorcerer. http://3.bp.blogspot.com/_YbXHpJPLjjM/TLmo3PxsRqI/AAAAAAAAAnU/dtipnyR3wWs/s1600/chosen-spec3.jpg Key tactics/abilities Quake – CAOE stagger Tzeentch’s Reflection – Increased disrupt chance and silence for 3 seconds. Siphoned Energy – Any time you disrupt a spell you will be healed for 105 hp and your movement speed will increases by 30% for 5 seconds Crippling Strikes – on crit 15% damage reduction Dreadful Terror – Draining AP (Action Points) and giving them to your group, which is also nice for those bombing sorcerers.
PVP: sword/boardNice Solid beginner build, perfect for sub RR60. This build provides great survivability and crowd control capabilities. http://3.bp.blogspot.com/_YbXHpJPLjjM/TLmorLJM8uI/AAAAAAAAAnM/JiYB8TMHvf0/s1600/chosen-spec1.jpg Key tactics/abilities Quake – obviously Downfall – The extra knockdown is really handy and the ability I miss most when not specced (other than Quake) Oppression – A personal 15% damage reduction from ALL sources and the armour increase make this better than crippling strikes for YOU, it has no effect on anyone else which is where crippling strikes is better. However in RvR Crippling Strikes works best when combined with Rending Blade and since you’ll nearly always have other Chosen nearby applying Crippling Strikes, it’s not essential for everyone. MIxed Defenses - adds 15% perry for 5 seconds every time you block
PVP: anti-bomb
Guides
MediaConcept Art
ScreenshotsSources
|
|||||||||||||||||||||||||||||||||||||||||||||||||||||||||||||||||||||||||||||||||||||||||||||||||||||||||||||||||||||||||||||||||||||||||||||||||||||||||||||||||||||||||||||||||||||||||||||||||||||||||||||||||||||||||||||||||||||||||||||||||||||||||||||||||||||||||||||||||||||||||||||||||||||||||||||||||||||||||||||||||||||||||||||||||||||||||||||||||||||||||||||||||||||||||||||||||||||||||||||||||||||||||||||||||||||||||||||||||||||||||||||||||||||||||||||||||||||||||||||||||||||||||||||||||||||||||||||||||||||||||||||||||||||||||||||||||||||||||||||||||||||||||||||||||||||||||||||||||||||||||||||||||||||||||||||||||||||||||||||||||||||||||||||||||||||||||||||||||||||||||||||||||||||||||||||||||||||||||||||||||||||||||||||||||||||||||||||||||||||||||||||||||||||||||||||||||||||||||||||||||||||||||||||||||||||||||||||||||||||||||||||||||||||||||||||||||||||||||||||||||||||||||||||||||||||||||||||||||||||||||||||||||||||||||||||||||||||||||||||||||||||||||||||||||||||||||||||||||||||||
