|
|
| Type
|
Special (Hell and Expansion only; Realm only in LoD, in D2R also single player)
|
| Initiation
|
Create portals in Harrogath in Act 5 in Hell
|
| Objective
|
Kill Mephisto, Diablo and Baal
|
| Areas
|
Harrogath, Matron's Den, Forgotten Sands, Furnace of Pain and Tristram
|
| Items
|
Key of Terror, Key of Hate, Key of Destruction, Diablo's Horn, Baal's Eye, Mephisto's Brain and Horadric Cube
|
| Rewards
|
Hellfire Torch Large Charm and Standard of Heroes
Experience
|
|
A new Mystery has been revealed!
Players of Hell Difficulty Realm games are hereby warned once again, that a series of new and challenging tests await you! The answer lies within Diablo's Bosses, which span across the world from the Den of Evil to the Throne of Destruction...
- Patch.txt for 1.11
A new challenge introduced in patch 1.11, this is not available in Single Player LoD or Classic.
In D2R it is available in Single Player and online Expansion games.
Key collecting
First stage involves killing particular monsters in Hell for keys dropped and then use them to create portals in Harrogath in Act 5. All should be familiar to players since they already need to be killed to complete quests (although none of these quests is normally mandatory).
- Chance is for when playing solo: Better Chance of Getting Magic Items does not improve drop chance, although playing in games with additional players does.
- Multiple keys can be dropped per kill, maximum five (although this is unlikely).
- Multiple keys of the same type can be present in inventory and stash: each requires 1x2 inventory space to pick up.
- Players normally collect three of each key before organ collecting.
Key of Terror
[7]
| Chance
|
1 in X
|
Treasure Class
|
Quality
|
| 0.0713983522 |
14.005925 |
Countess (H) |
Unique: 883 Set: 883 Rare: 983 Magic: 1024
|
Key of Hate
[8]
| Chance
|
1 in X
|
Treasure Class
|
Quality
|
| 0.0861533746 |
11.607206 |
Summoner (H) |
Unique: 900 Set: 900 Rare: 972 Magic: 1024
|
Key of Destruction
[9]
| Chance
|
1 in X
|
Treasure Class
|
Quality
|
| 0.0793234601 |
12.606611 |
Nihlathak (H) |
Unique: 900 Set: 900 Rare: 900 Magic: 1024
|
Organ collecting
- When in Harrogath of Act 5 in Hell, place one of each key in Horadric Cube and transmute to generate portal to one of three areas: take care, since all look identical and only their label distinguishes them.
- Since area is randomly selected from those which have not already been accessed in that game, it is advisable to collect three sets of keys and create portals to all three areas in the same game: be sure to move to different positions for subsequent portals, otherwise they may be difficult or impossible to use.
- It is advised to open one portal at a time and get the organ before opening the next one (but still in the same game) rather than all three at once, in order to minimize wasted keysets in case of a game crash or internet outage.
- In LoD melee attackers specialising in physical damage are recommended for the remainder of this quest, with Paladins using Smite being particularly popular since it always hits and cannot be blocked. This is because monsters including the bosses themselves have one or two immunities that cover all damage types, many of which cannot be removed. However, none of bosses is Immune to Physical, and those monsters that are can have it removed by Decrepify or Amplify Damage, or ignored by Sanctuary (since they are undead).
In D2R other elements are Pandemonium Event viable with the use of Sunder, although Paladin using Smite is still the most effective.
- Prevent Monster Heal does not apply to any of the bosses encountered for the remainder of this quest. All have 650,000-660,000 base life, resulting in 15,869 36/256 - 16,113 72/256 damage regeneration per second, increasing by 50% with each additional player in game at time of spawning. Poison Damage, Open Wounds and skills applying damage every frame (like Immolation Arrow or Meteor pyres and Fire Wall) can stop regeneration entirely.
- Melee attackers are also recommended due to ability to apply Crushing Blow and benefit from Life Stolen per hit or Life Tap, or deliver massive damage to a single target which always hits and cannot be blocked (like an Amazon using Charged Strike).
- Characters specialising in Cold Damage and Poison Damage will be unable to kill bosses in all three areas.
- Enter portals and search areas for bosses.
Diablo's Horn
- While similar to Andariel, she does not share her weakness against Fire Damage (Fire Resist 75%).
- 0 chill effectiveness means cold length does not slow her down.
- She applies high physical and poison damage with all her melee attacks, poison bolts and poison spray (the latter two apply no more damage per collision than Andariel, but Multiple Shots triples number of missiles fired).
- All level-adjusted stats (defense, Attack Rating, life, damage and experience) are higher than the original due to being level 110, which also makes her harder to hit with attacks.
- 4-5 random Champion or Unique packs spawn in area, which can increase danger when they spawn near her and have bonuses which enhance her already high physical damage (Aura Enchanted with Might or Fanaticism, or Cursed). 60% chance of Vile Witches being selected, capable of casting Amplify Damage.
- When killed, she will drop Diablo's Horn, requiring one inventory space to pick up.
Baal's Eye
- Duriel spawns to north of waypoint, so there is no need to search area for him.
- Aside from a standard Attack, he uses Jab and Smite (which requires a hit-check and can be blocked). Fortunately he does not use Charge. [10]
- He has 100% drain effectiveness.
- All level-adjusted stats (defense, Attack Rating, life, damage and experience) are higher than the original due to being level 110, which also makes him harder to hit with attacks.
- When killed, he will drop Baal's Eye, requiring one inventory space to pick up.
Mephisto's Brain
- All level-adjusted stats (defense, Attack Rating, life, damage and experience) are higher than the original due to being level 110, which also makes him harder to hit with attacks.
- When killed, he will drop Mephisto's Brain, requiring one inventory space to pick up.
Tristram
- When in Harrogath of Act 5 in Hell, place all three organs in Horadric Cube and transmute to create portal back to Tristram: this has the same layout as the original, but portal spawns outside northeast wall of building to north of town square. Tristram is unpopulated except for the three Prime Evils in east corner of town square (which no longer contains the gibbet from which Deckard Cain was rescued).
- Town Portals cannot be cast in Tristram.
- Grimborn's The Poorman takes on Uber Tristram contains details of how to draw out each one to be engaged in single combat, rather than all three at once.
- As mentioned earlier, in LoD melee attackers specialising in physical damage are recommended, with Paladins using Smite being particularly popular since it always hits and cannot be blocked: this is because Pit Lords always immune to everything except physical damage can be summoned, and at least one of the three has an immunity to one of other damage types except for Magic Damage.
- Prevent Monster Heal does not apply and all three have 650,000-660,000 base life, resulting in 15,869 36/256 - 16,113 72/256 damage regeneration per second, increasing by 50% with each additional player in game at time of spawning. Poison Damage, Open Wounds and skills applying damage every frame (like Immolation Arrow or Meteor pyres and Fire Wall) can stop regeneration entirely.
- Melee attackers are also recommended due to ability to apply Crushing Blow and benefit from Life Stolen per hit or Life Tap, or deliver massive damage to a single target which always hits and cannot be blocked (like an Amazon using Charged Strike).
- Characters specialising in Cold Damage will be unable to kill all three.
- All level-adjusted stats (defense, Attack Rating, life, damage and experience) are higher than the originals due to being level 110, which also makes them harder to hit with attacks.
- Level 20 Conviction applies Fire Resist, Lightning Resist and Cold Resist -125% (and -90% Defense), a significant penalty which can be countered by applying excess resistance:
- Paladin supplying Salvation can significantly reduce excess required for all allies.
- Treachery body armor's 5% Chance to Cast Level 15 Fade When Struck applies Resist +60% (and Damage Reduced by 15%) for 288 seconds (4 minutes 48 seconds). Safest way to cast it is to equip armor and stand in fire: there are fires in or around ruins in north corner of Tristram, outside Harrogath's main gate and to either side of Hadriel above River of Flame waypoint in Act 4. Once Fade has been cast, player can remove and replace armor.
- Paladin applying level >20 Conviction before him is unaffected by Mephisto's aura (although any allies remain vulnerable).
- Has same skills as the original Mephisto, although Prime Bolt is significantly higher at level 27, releasing 29 bolts applying 1-482 Lightning Damage each. Can also summon the following:
- Has 0% drain effectiveness: casting Life Tap is recommended unless well-equipped.
- Characters specialising in Lightning Damage or Poison Damage will be unable to remove immunity unless playing with a Necromancer casting level >9 Lower Resist or a Paladin supplying level >19 Conviction: the former breaks both immunities while the latter can break lightning immunity. Once immunity has been broken, remaining resistance can be further reduced by -% Enemy Resistance.
In D2R Sunder can be used.
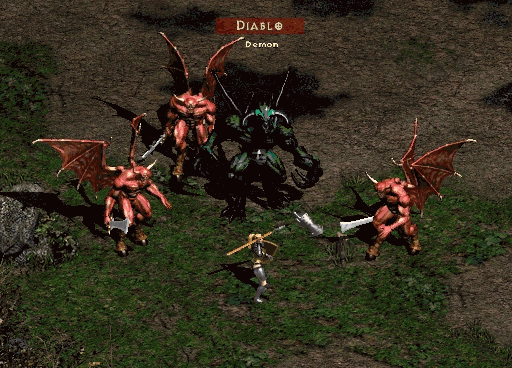 Diablo is an Extra Fast Magic Resistant boss and Evil who is Immune to Fire (110%) and Immune to Cold (115%). Neither bonuses nor immunities are displayed. [5]
- Like World Event Diablo, has faster movement speed than the original (further augmented by being Extra Fast) and uses all the same skills, although some are actually slightly weaker. However, he has also gained Diablogeddon, which is similar to Druid's Armageddon skill.
- While both immunities can be removed by an Infinity polearm's Level 12 Conviction Aura When Equipped and further reduced by -% Enemy Resistance, since the polearm is typically equipped by a Desert Mercenary the challenge becomes keeping him alive. Additionally, Diablo can summon Pit Lords always immune to everything except physical damage.
 Baal is an Extra Fast Cold Enchanted Magic Resistant boss and Evil who is Immune to Fire (115%) and always Immune to Cold (185%). He casts level 37 Chilling Armor. Neither bonuses nor immunities are displayed. [6]
- Has same skills as the original Baal, with the addition of Chilling Armor. Can also summon the following:
- While fire immunity can be removed by an Infinity polearm's Level 12 Conviction Aura When Equipped and further reduced by -% Enemy Resistance, since the polearm is typically equipped by a Desert Mercenary the challenge becomes keeping him alive.
Reward
- One Large Charm and as many Standard of Heroes as there are players in the game drop from the last Evil killed in Tristram. Pandemonium Event can be completed more than once, but a character cannot pick up the charm if one is already present in inventory or stash.
- In D2R, placing an Annihilus in one's shared stash will not prevent the character from picking up another one.
- Charm cannot be transferred from one character to another by selling to vendor: once sold, it does not appear in vendor inventory and is lost forever.
- In D2R, can be transferred from one character to another by placing in shared stash.
- Standard of Heroes currently serves no purpose other than a memento, which requires 1x1 inventory space to pick up. Multiple standards can be present in inventory or stash.
Reference
|

.png)
.png)
.png)
.png)
.png)